Sync and Share Salesforce Contacts With Your Team’s Google Accounts While Cutting CRM Costs

Salesforce is a cloud-based customer relationship management (CRM) platform. It provides a suite of tools and services to help businesses manage their relationships and interactions with customers and potential customers.
While Salesforce is a powerful and extremely versatile CRM platform, several considerable drawbacks may prevent some companies from using it.
Salesforce is expensive, especially for small businesses and startups. The subscription fees, along with additional costs for add-ons, integrations, and customizations, can add up quickly. The pricing structure is often complex, with various editions and modules that can be confusing and make it difficult to predict total costs.
Most importantly, for small businesses with simple CRM needs, like contact management, Salesforce’s wide-ranging features may be more than necessary, making it an inefficient choice and expensive choice since some businesses may lack the resources needed to fully leverage the capabilities of Salesforce.
So, is there a solution for companies seeking an efficient contact management solution without the high costs per user and unnecessary features? The answer is Yes! Tools like Google and Shared Contacts Manager offer an affordable option for managing and sharing contacts among colleagues or departments, costing next to nothing compared to Salesforce individual licenses. Simply connect your Salesforce account to Google, install the Shared Contacts Manager, and within minutes, your entire team can access, view, and edit Salesforce CRM contacts.
To connect your Google account to Salesforce, you’ll need to install and configure the Einstein Activity Capture (EAC) tool. It allows Salesforce users to sync their Google accounts with Salesforce, enabling synchronization of emails, calendar events, and contacts between the two platforms.
Setting up Einstein Activity Capture for the first time requires careful attention and involves several steps. However, once the tool is set up, all subsequent updates to your contact data will be automatically synchronized with your Google account. Follow these detailed steps to get started:
- Assigning user license for Einstein Activity Capture
- Permission Assignment in Einstein Activity Capture
- Configuring Einstein Activity Capture settings
- Connecting a Google account
- Sharing Salesforce Contacts With Team Members
1. Assigning User License for Einstein Activity Capture
First, you need to grant the user a license to use EAC. Follow these steps:
- In the left panel of the Administration menu locate the Users submenu.
- Click Users in the dropdown.
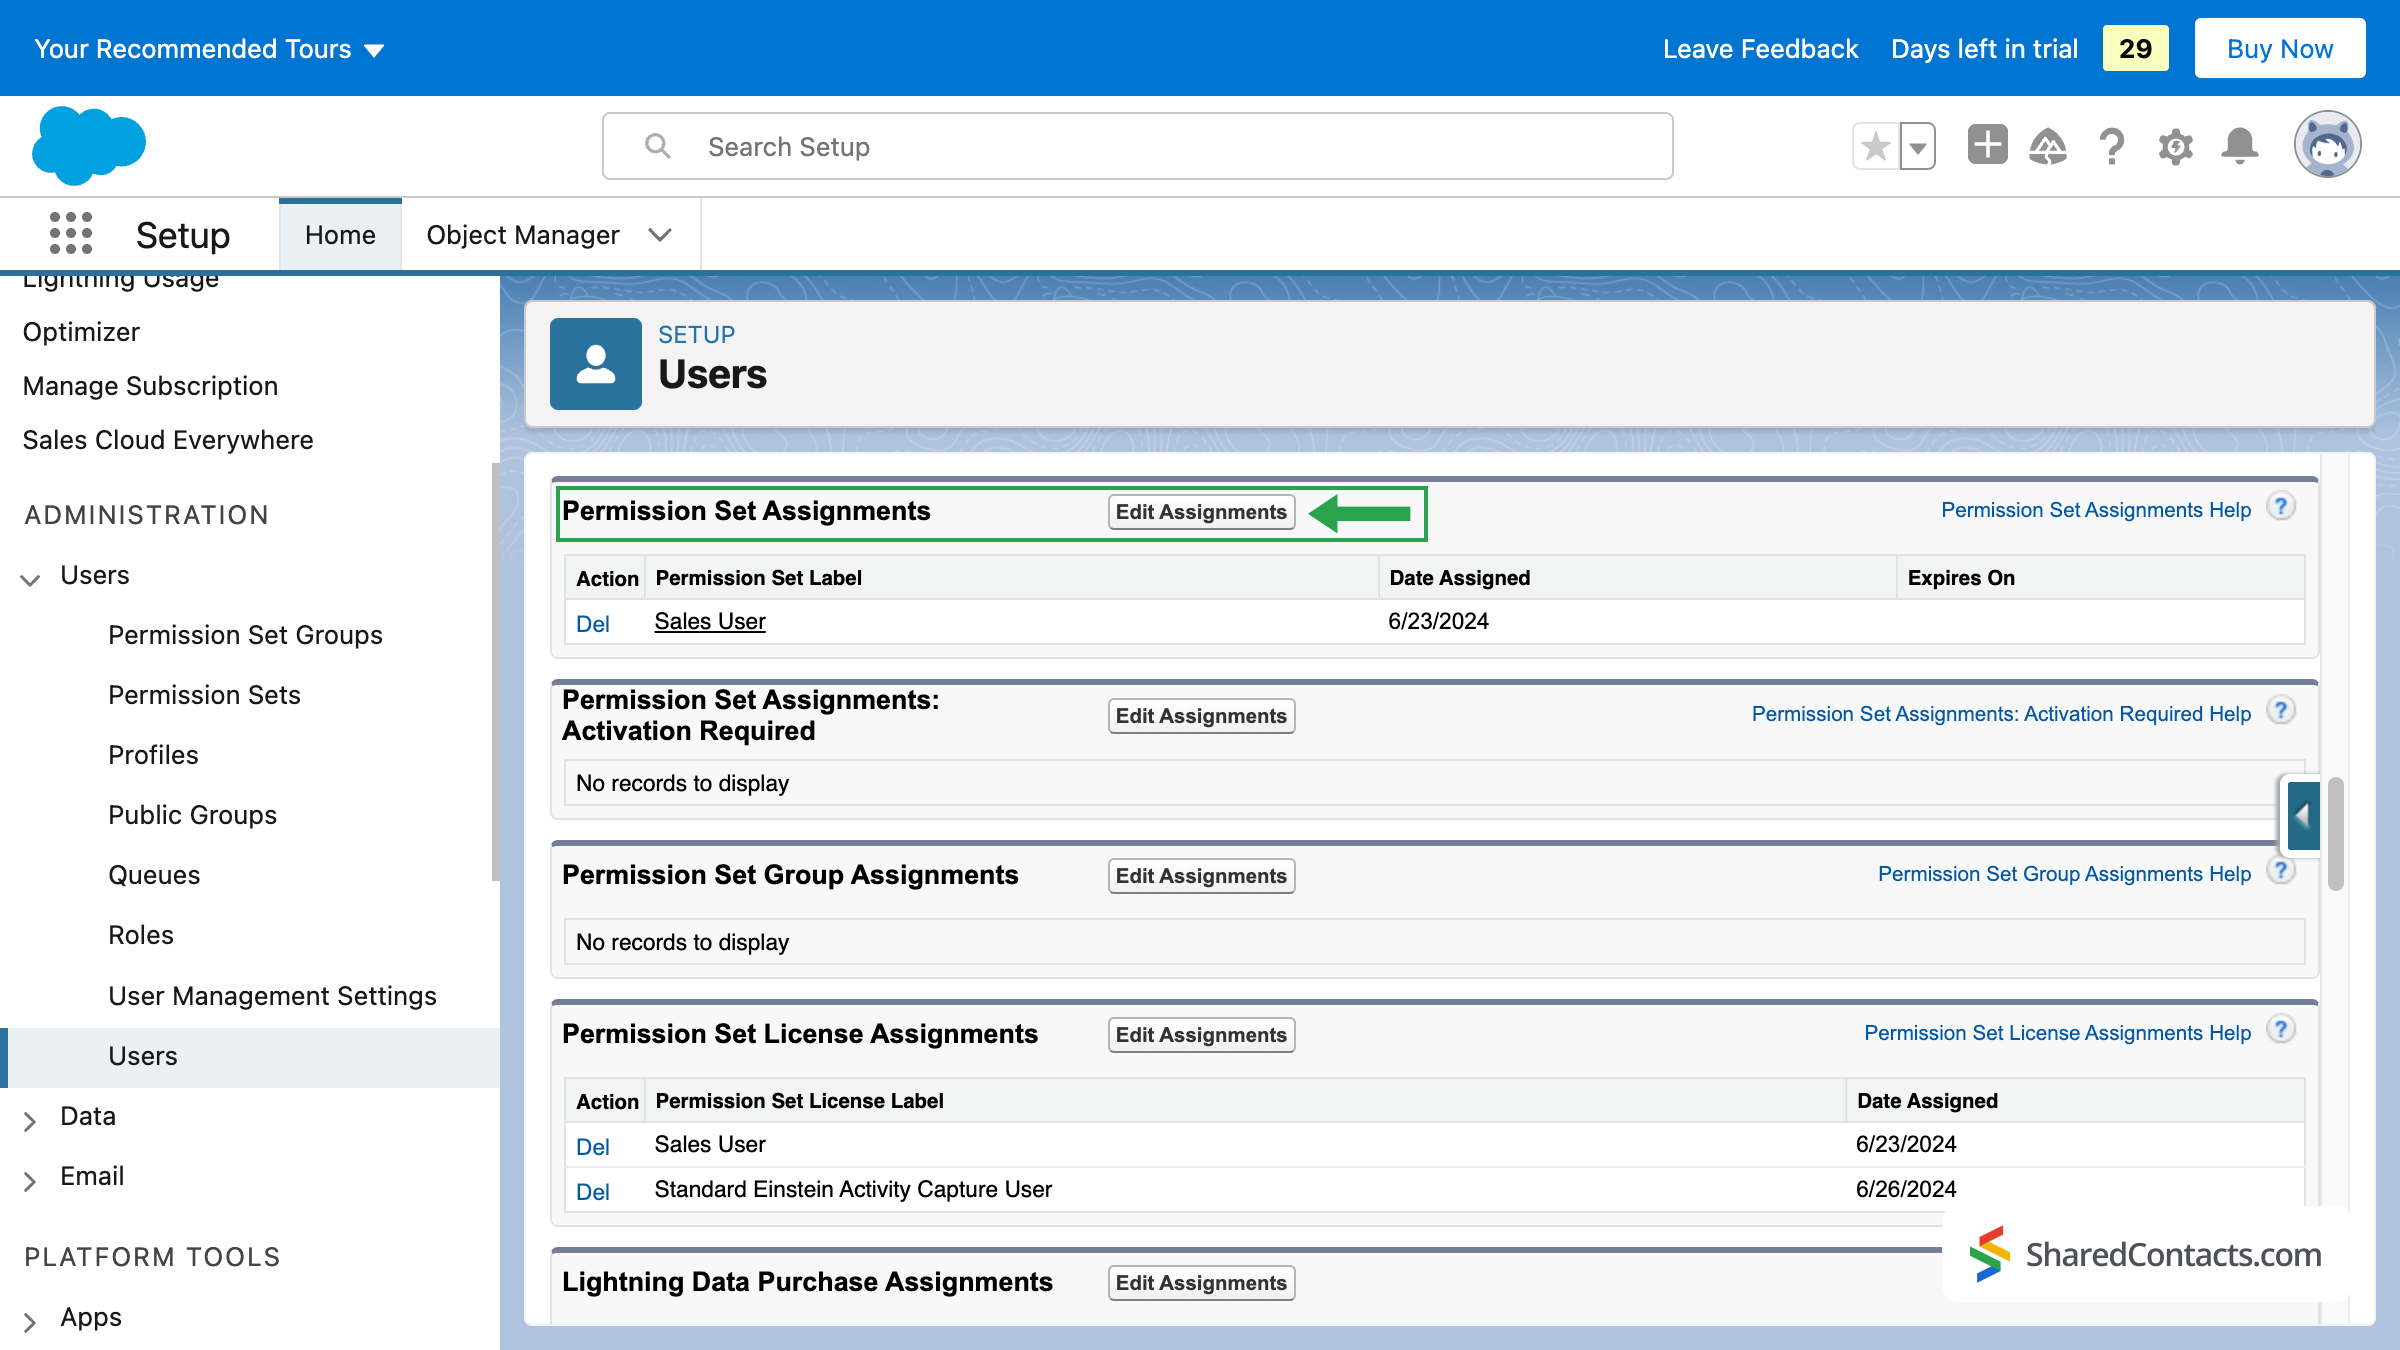
- In the list of all users, select the person you will connect to EAC and whose contacts will be synchronized with the Google account.
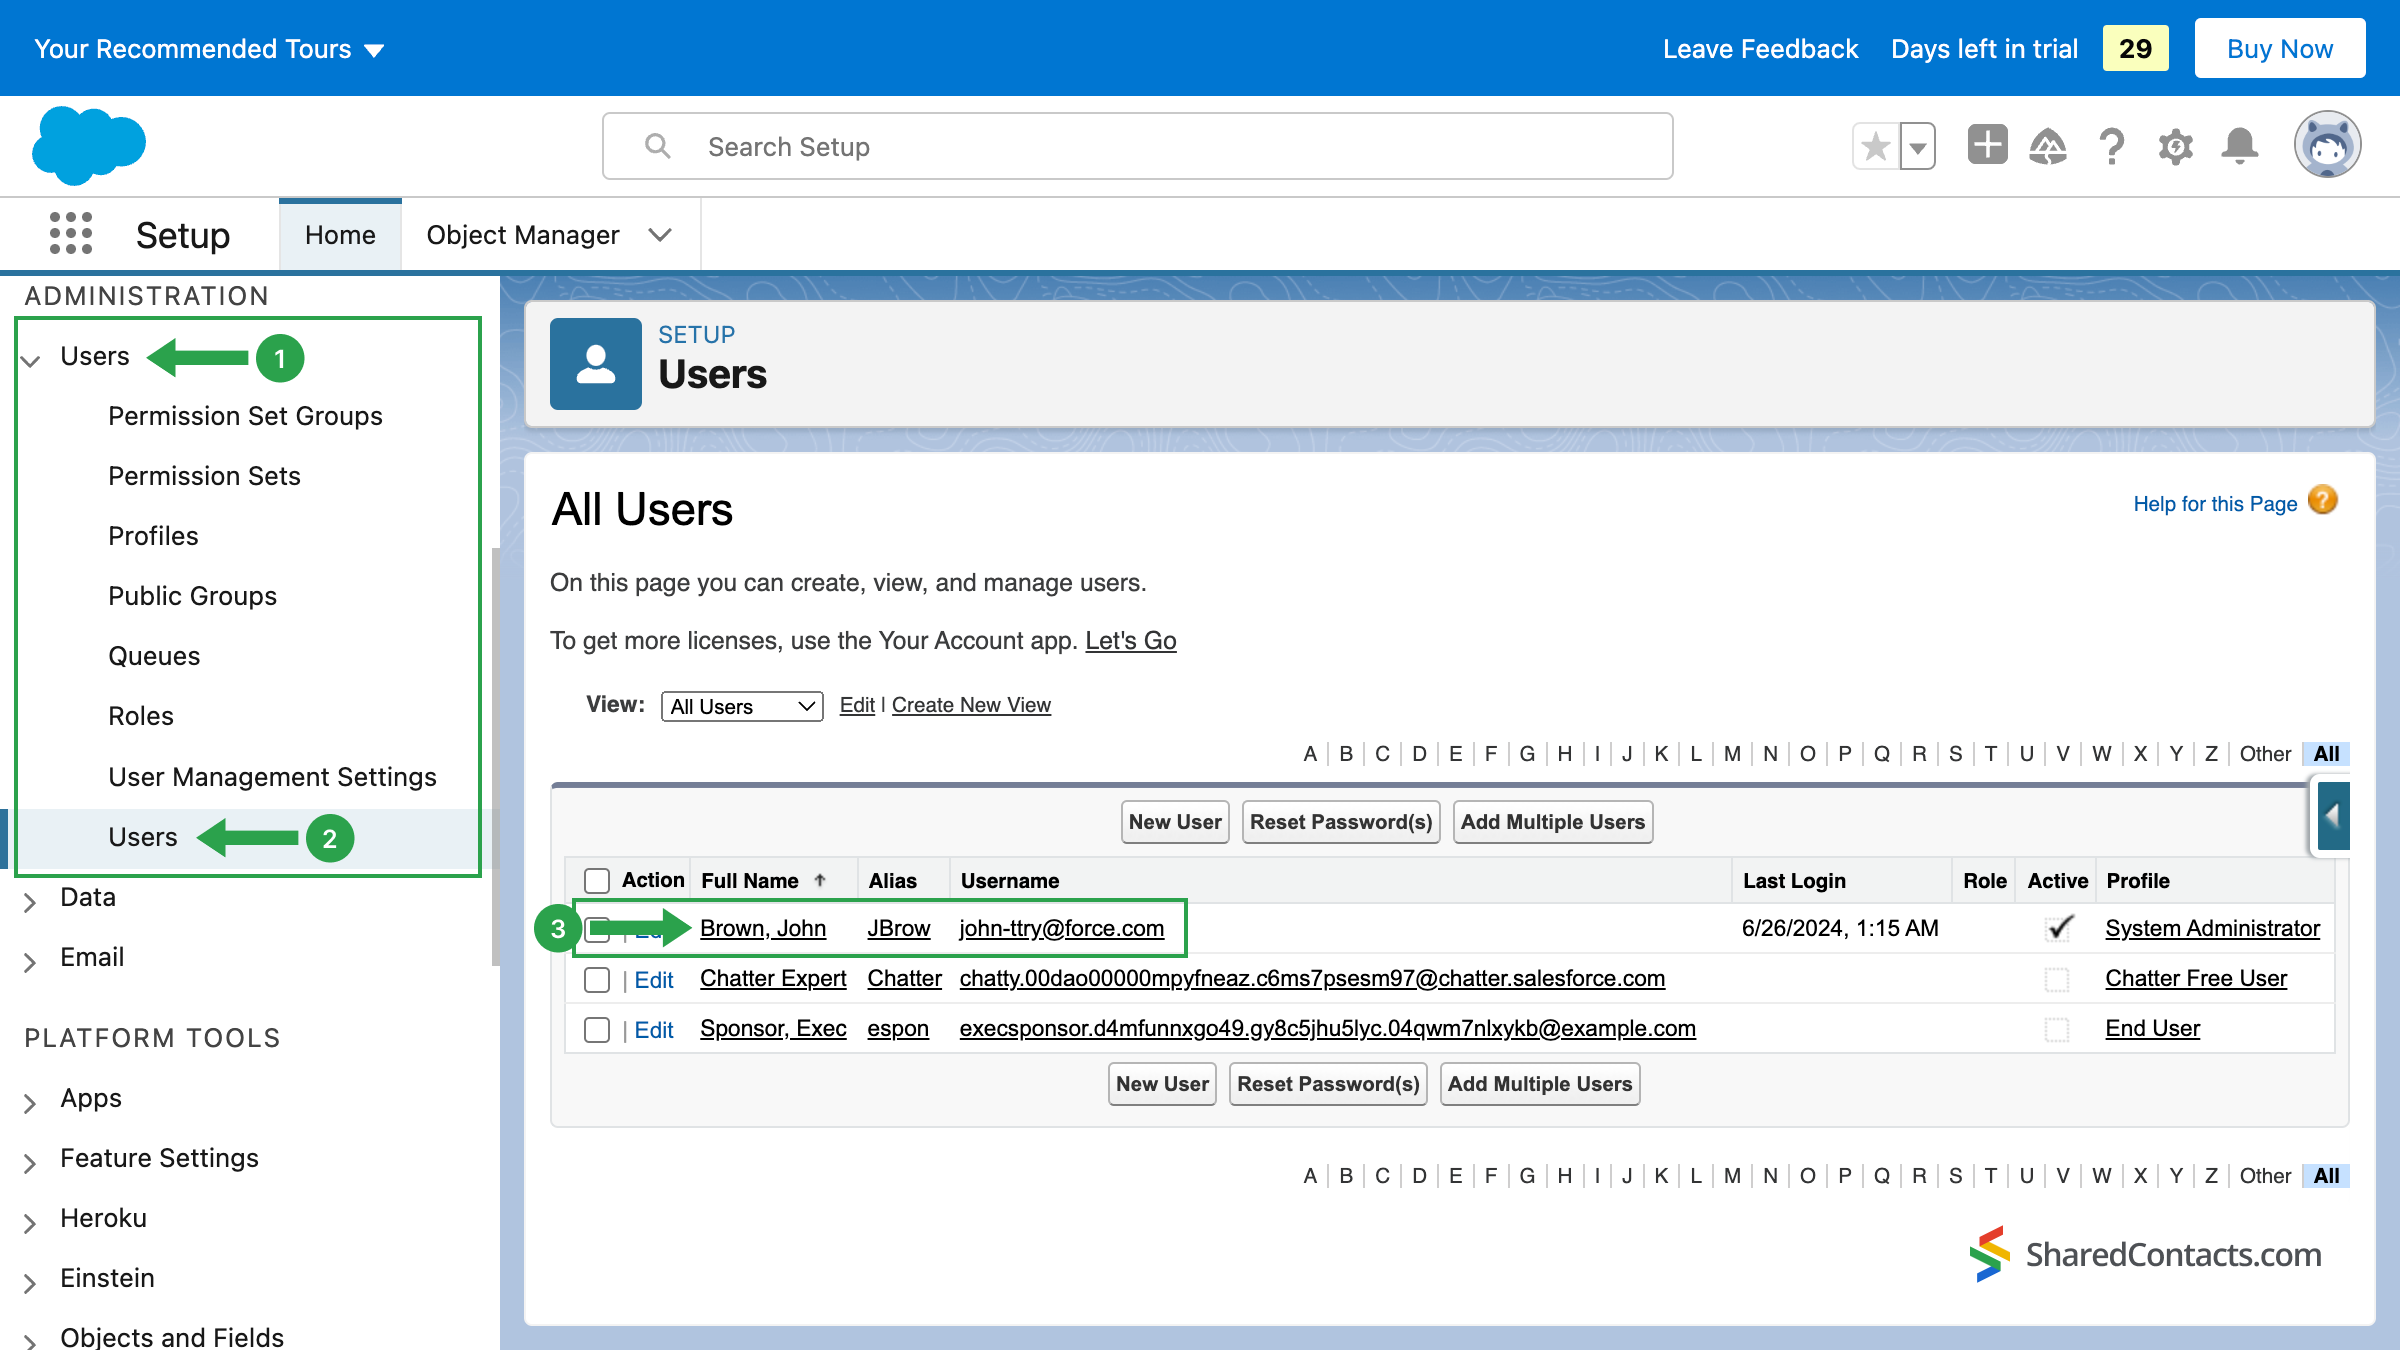
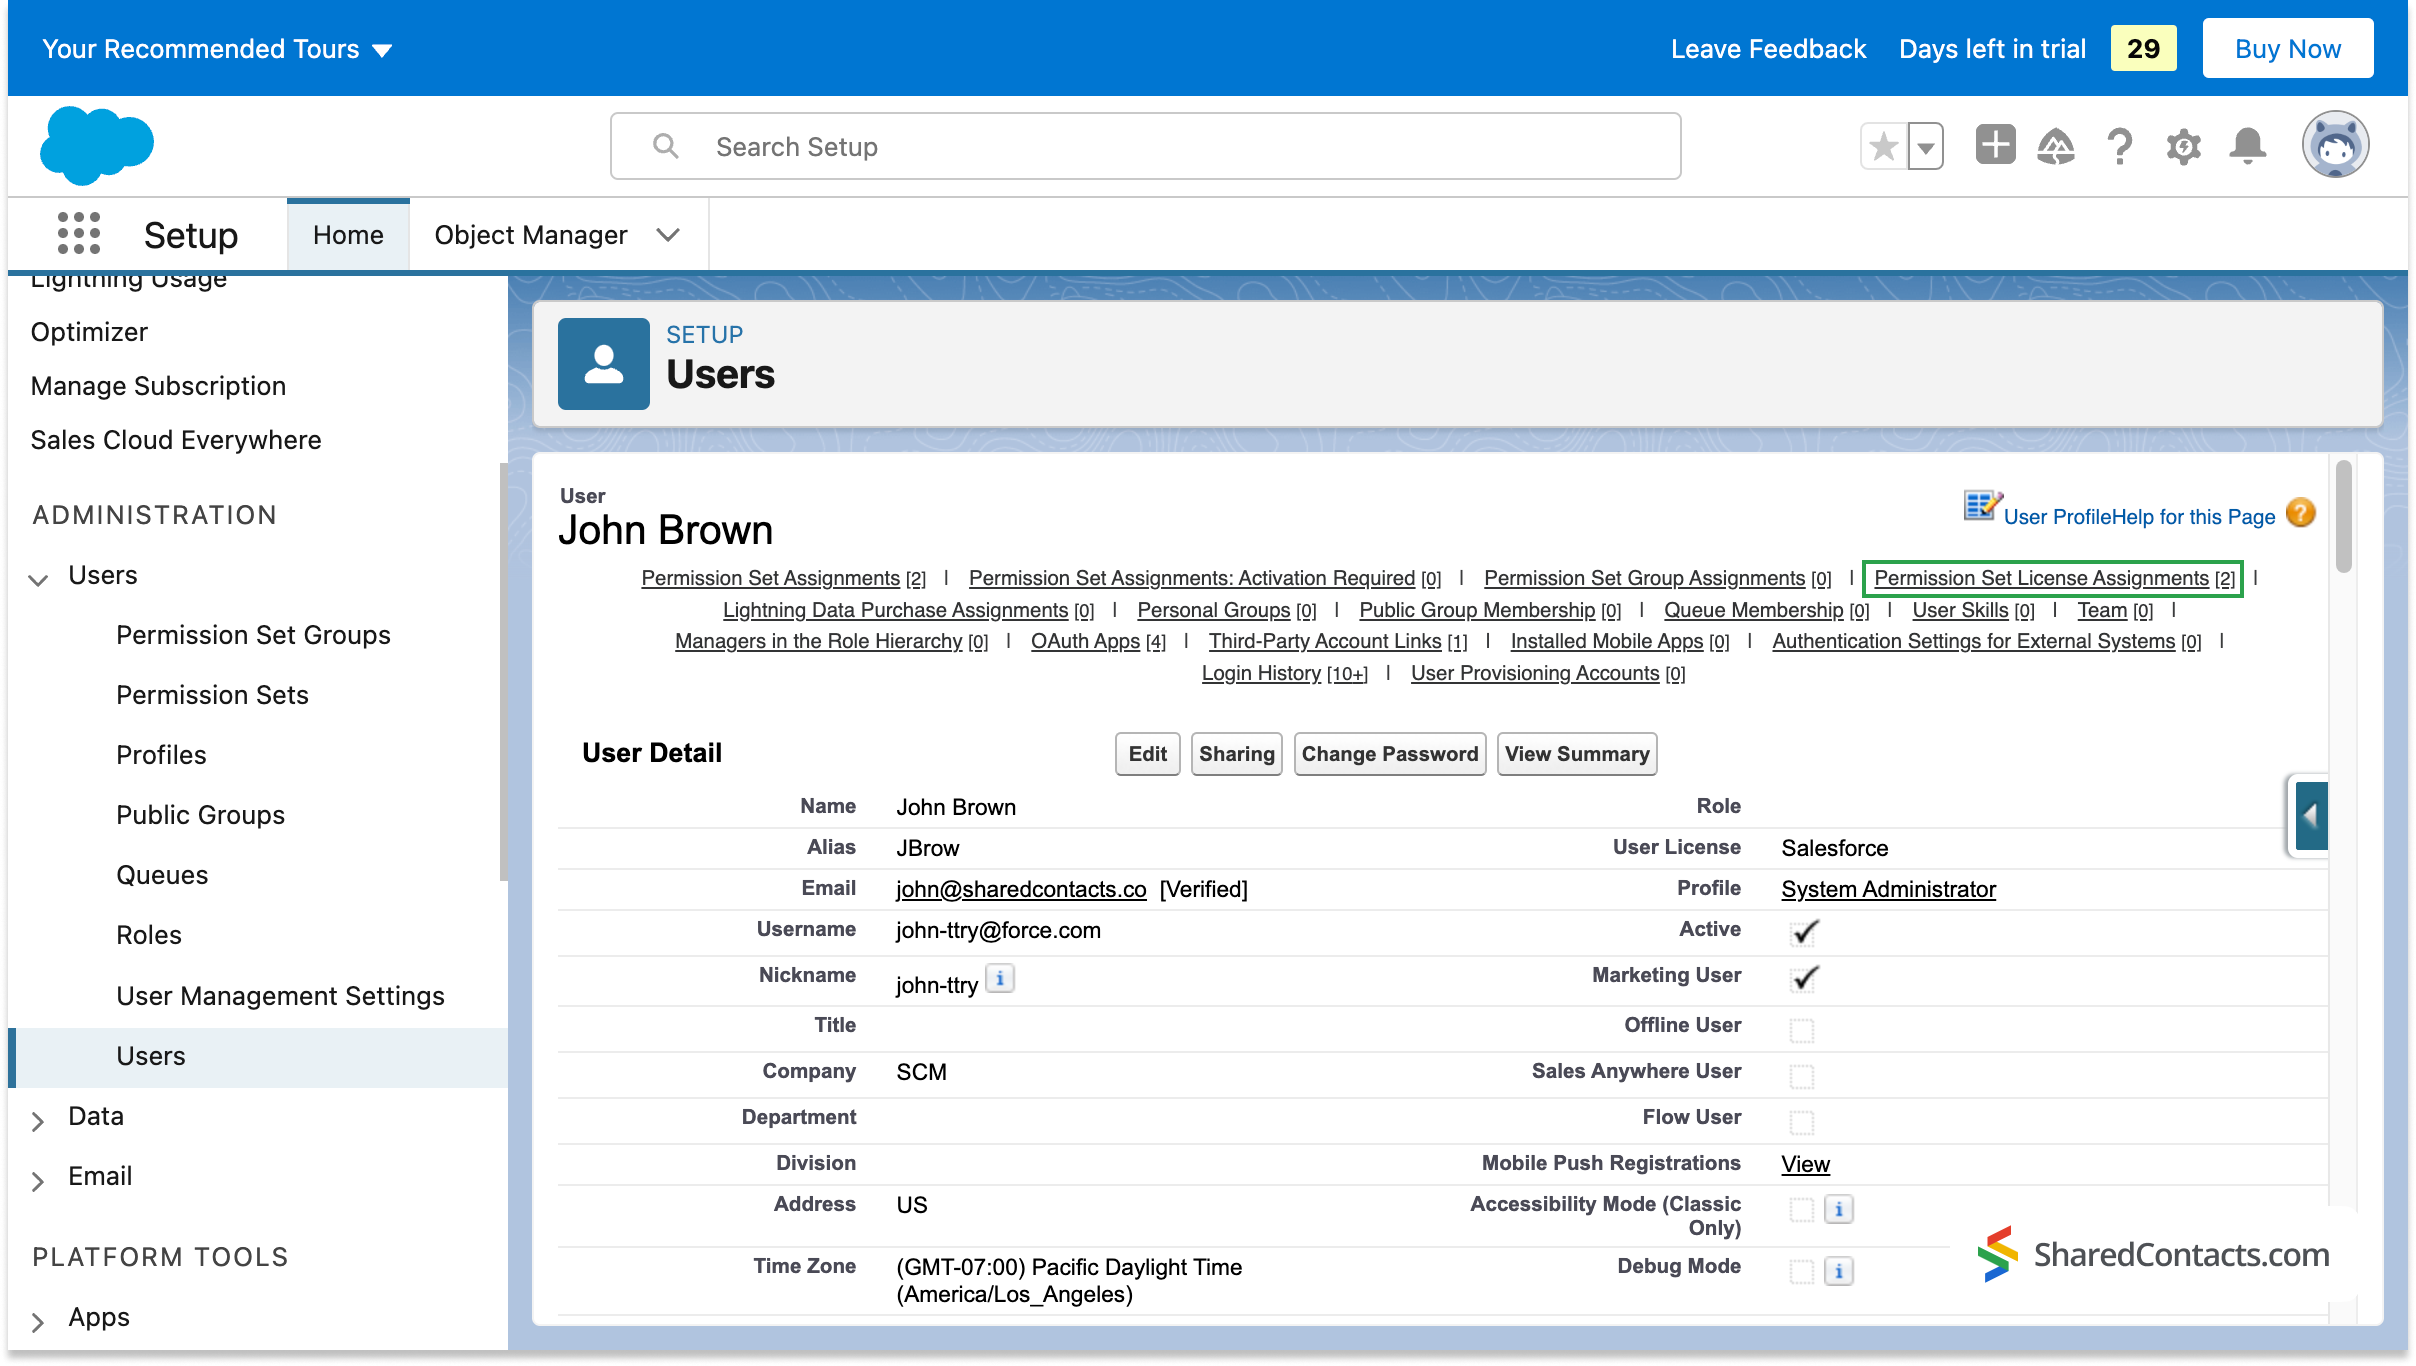
Now, you need to assign licenses to the selected user. Click on Permission Set License Assignments associated with the selected user.
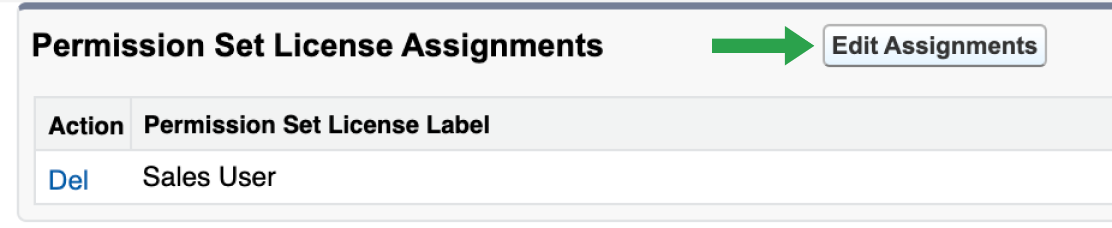
In the next window, click on Edit Assignments.
Scroll through the list of available licenses, find the license you need – Standard Einstein Activity Capture User, place a checkmark next to it (1), and hit the Save button (2).
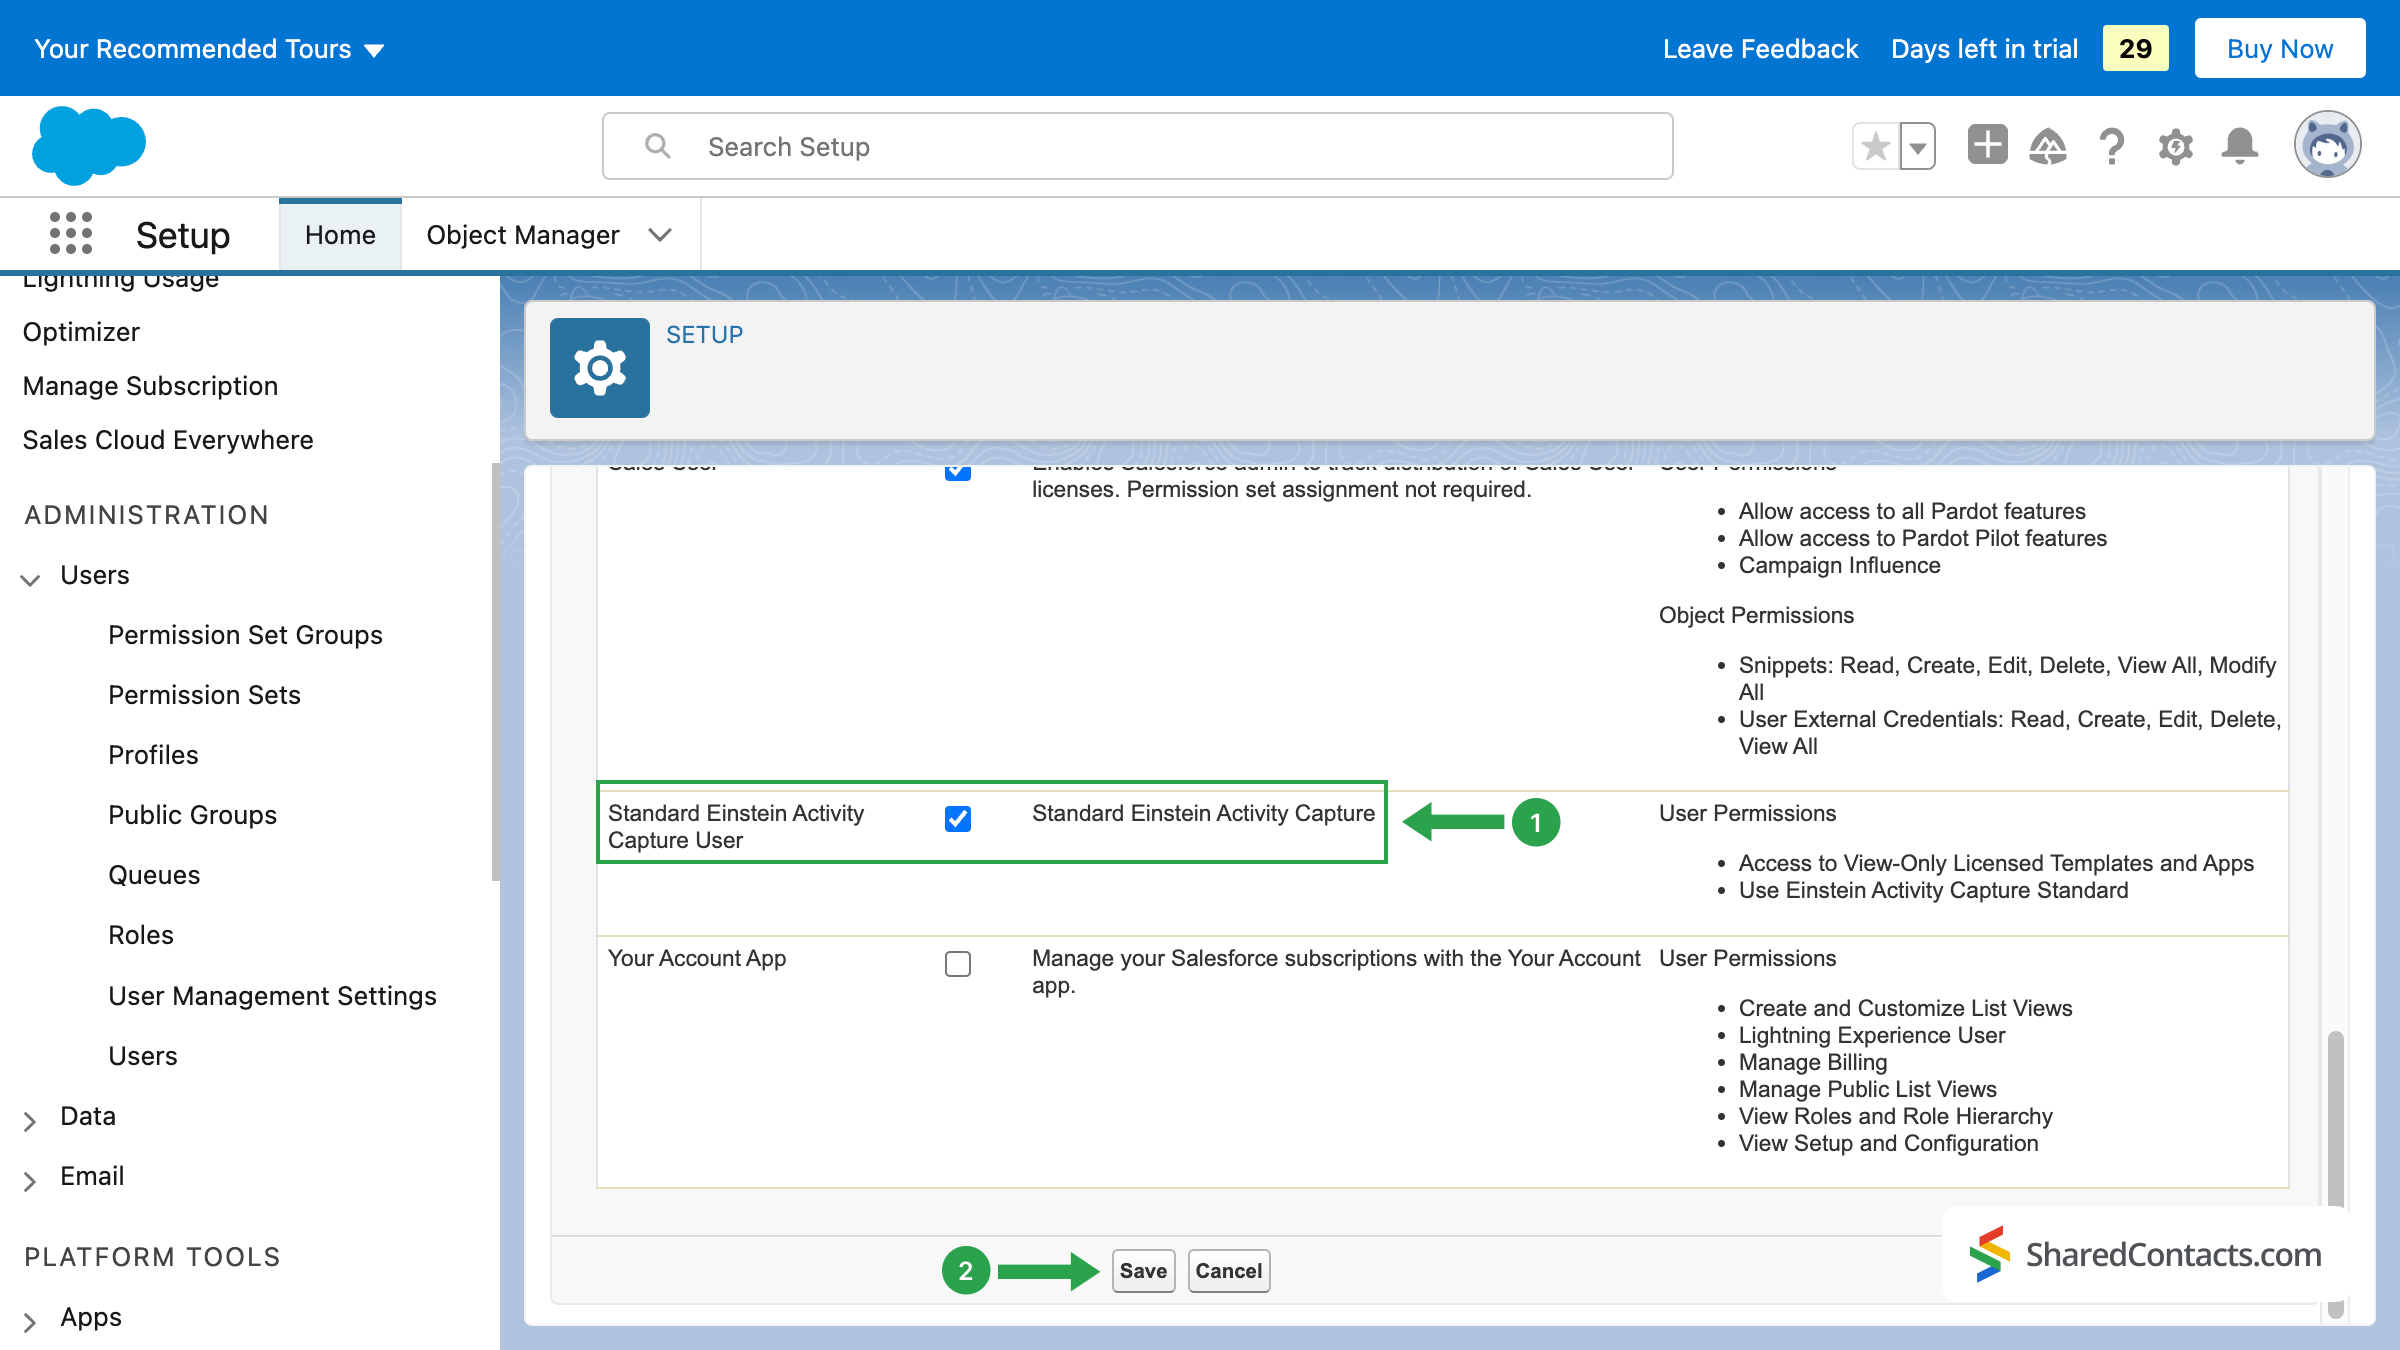
The first step is over. You have just selected the user and assigned their Einstein Activity Capture license.
2. Permission Assignment in Einstein Activity Capture
The next thing you need to do is to assign a permission set. This will enable your chosen user to configure and use the Einstein Activity Capture functionalities.
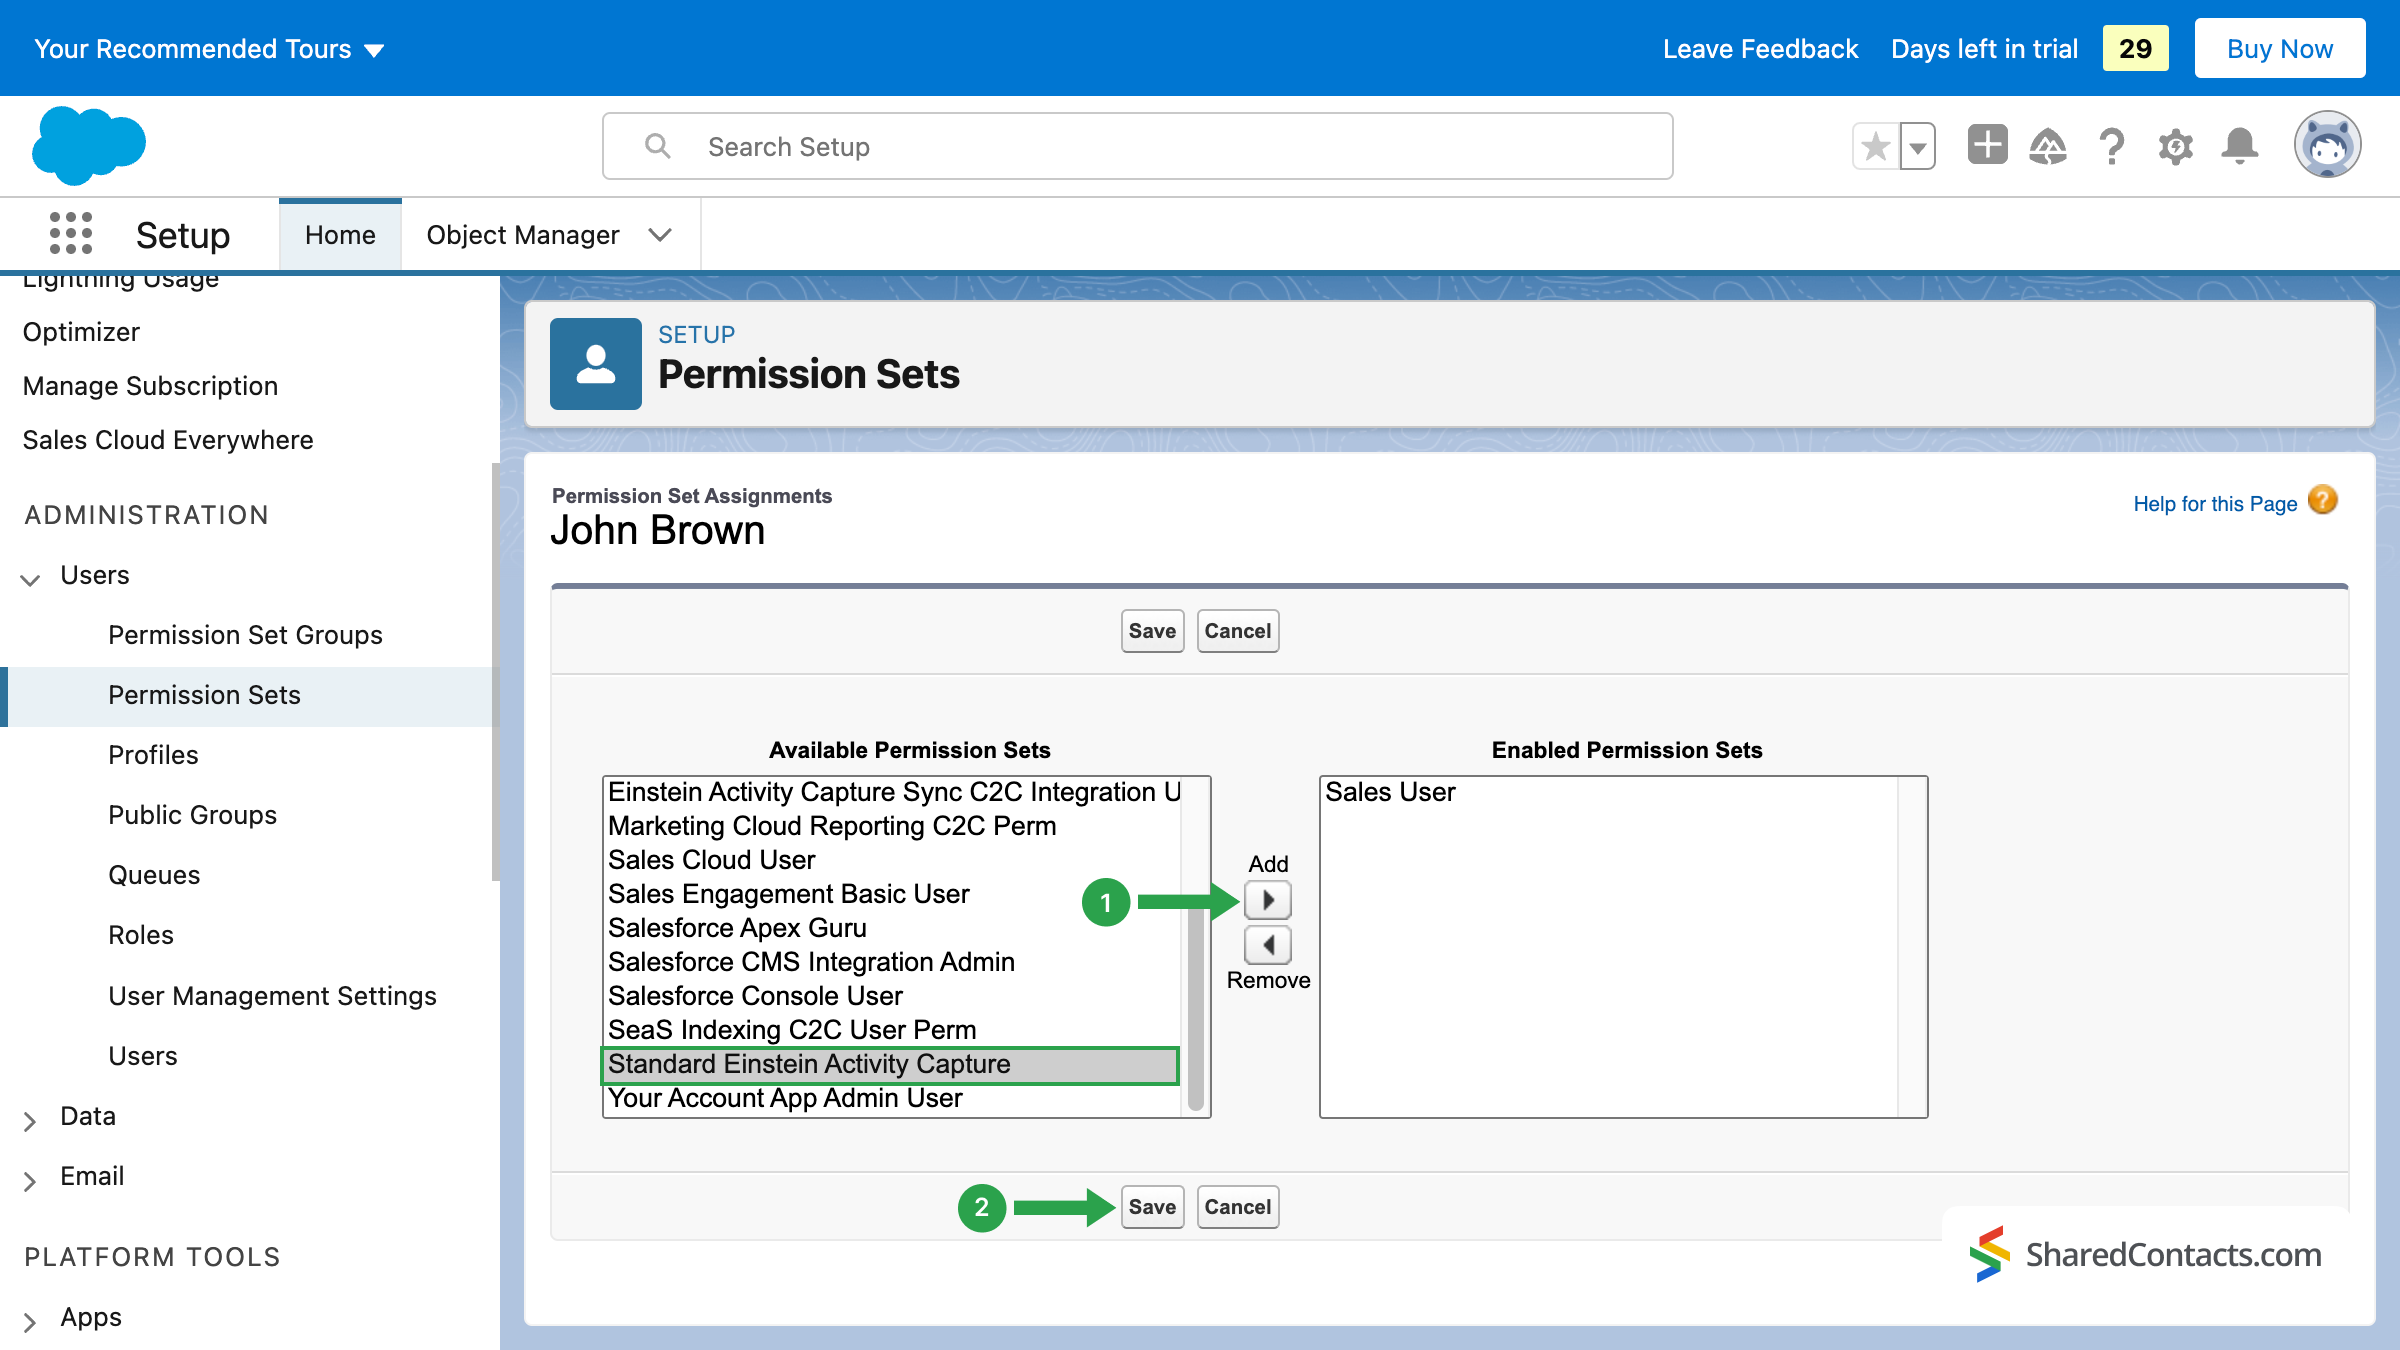
In the familiar User menu, locate the Permission Set Assignments section, and click Edit assignments.
- Salesforce will now display all available Permission Sets. Select Standard Einstein Activity Capture from the permission list and click the Add icon to move the permission set to the right field with enabled sets.
- Press Save once the Standard Einstein Activity Capture permission set is enabled.
At this point, you have completed providing the user with all the necessary licenses and permissions to use EAC. Now, you can proceed to the settings of the tool itself.
3. Configuring Einstein Activity Capture Settings
The EAC settings process consists of several stages:
- Connecting Google G Suite.
- Synchronization settings.
- Adding Users.
3.1 Connecting Google G Suite
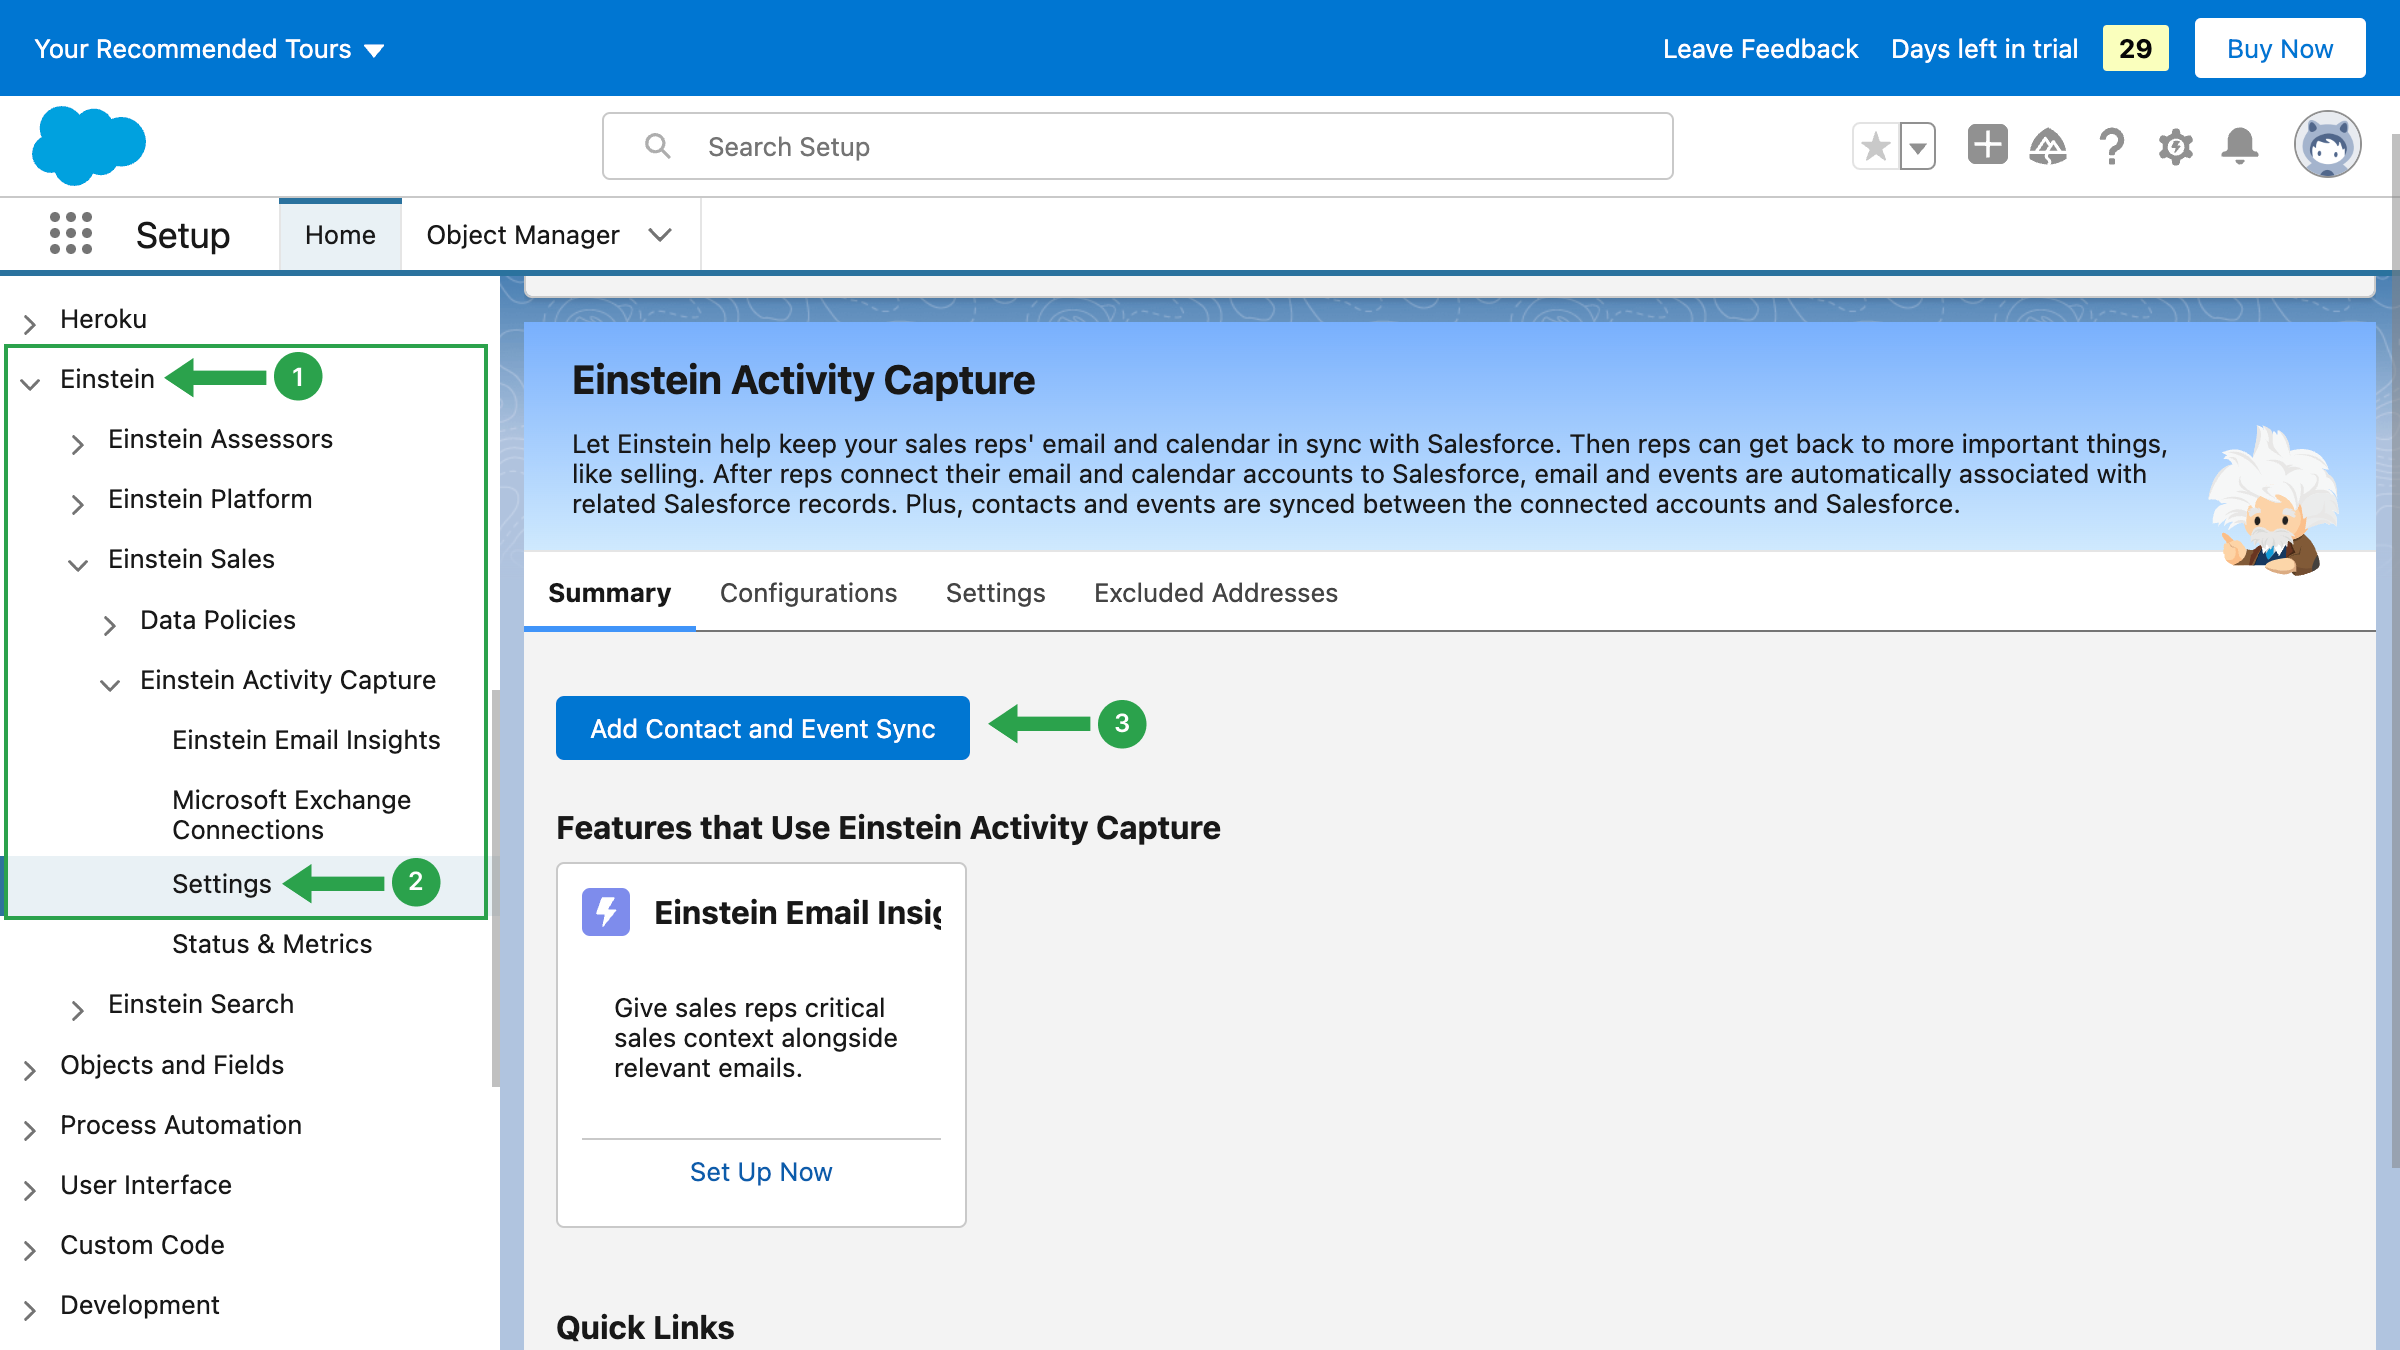
- Let’s start with connecting EAC to Google. In the left-hand menu, find the sub-item Einstein.
- Click on Einstein Activity Capture and select Settings from the drop-down list. The system will lead you through two welcome screens where you should hit the Get started button, prove that you’re authorized to accept terms and conditions by checking the corresponding box, and hit Try Einstein.
- Press on the Add Contact and Event Sync.

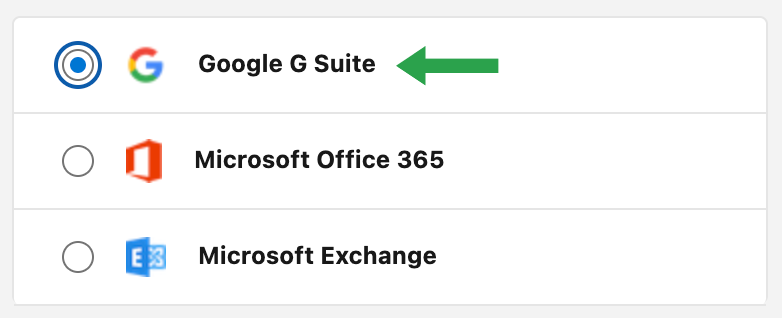
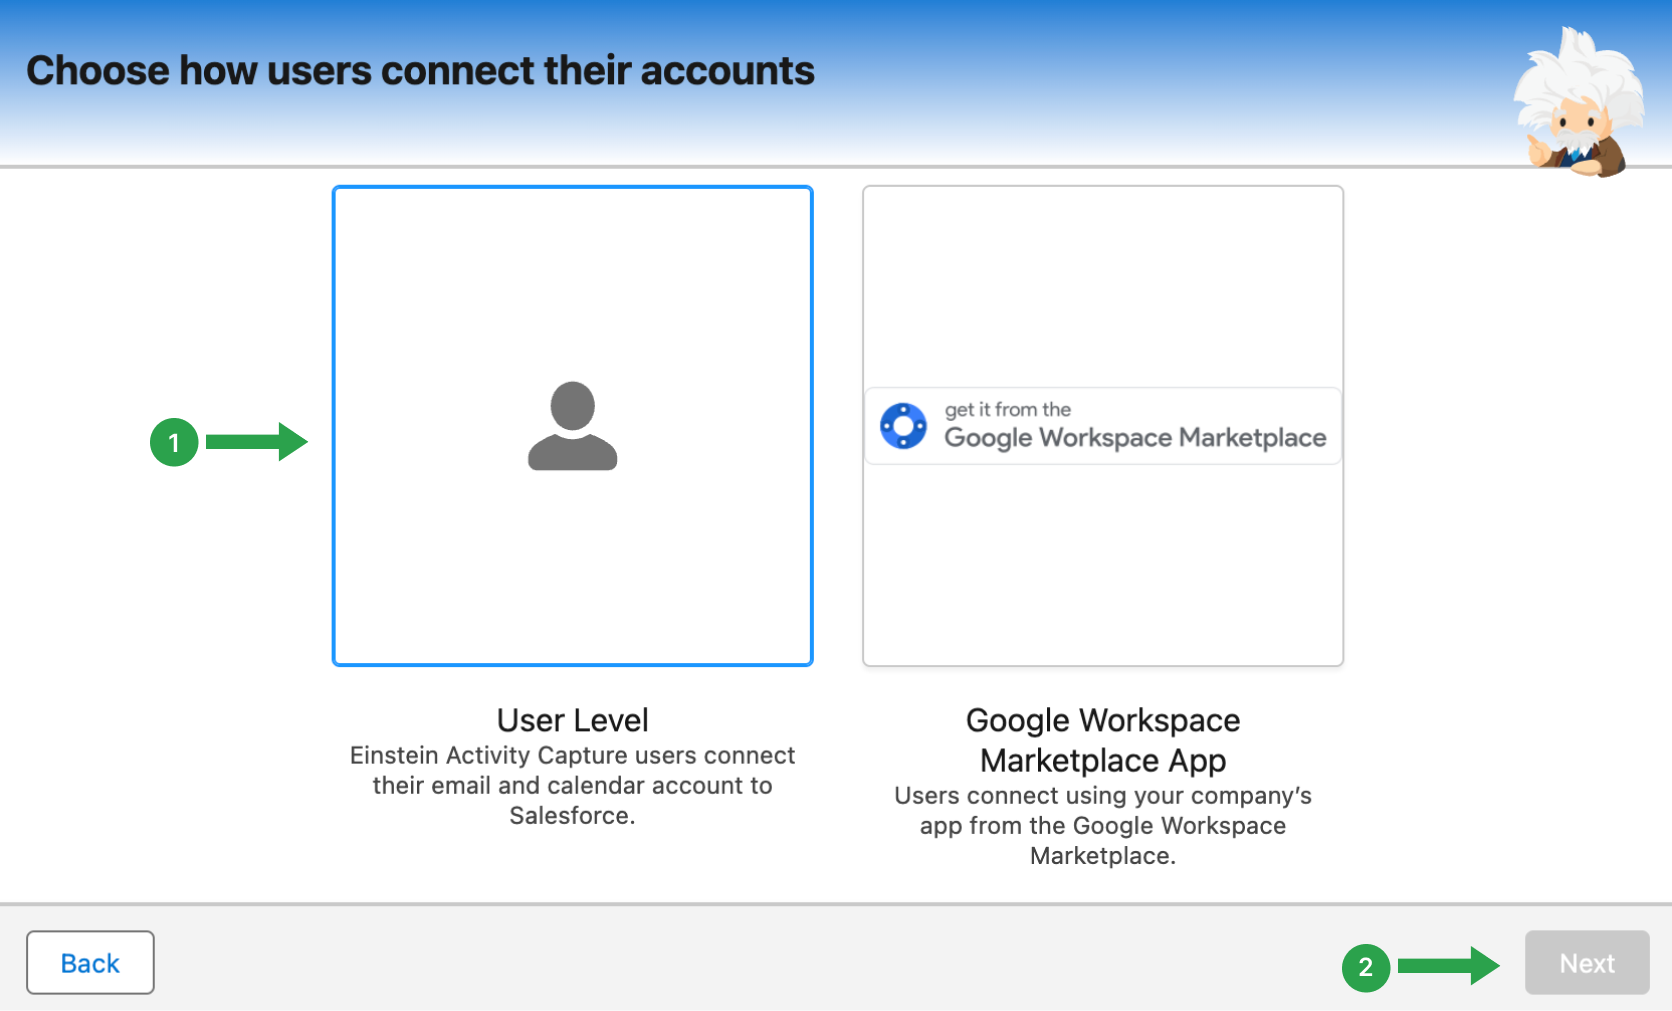
After that, you will be prompted to choose your email service provider. Since we plan to connect our Google contacts, choose Google G Suite from the options available, and press the Next button to continue.
For the Authentication Method select User level (1) and click Next (2).
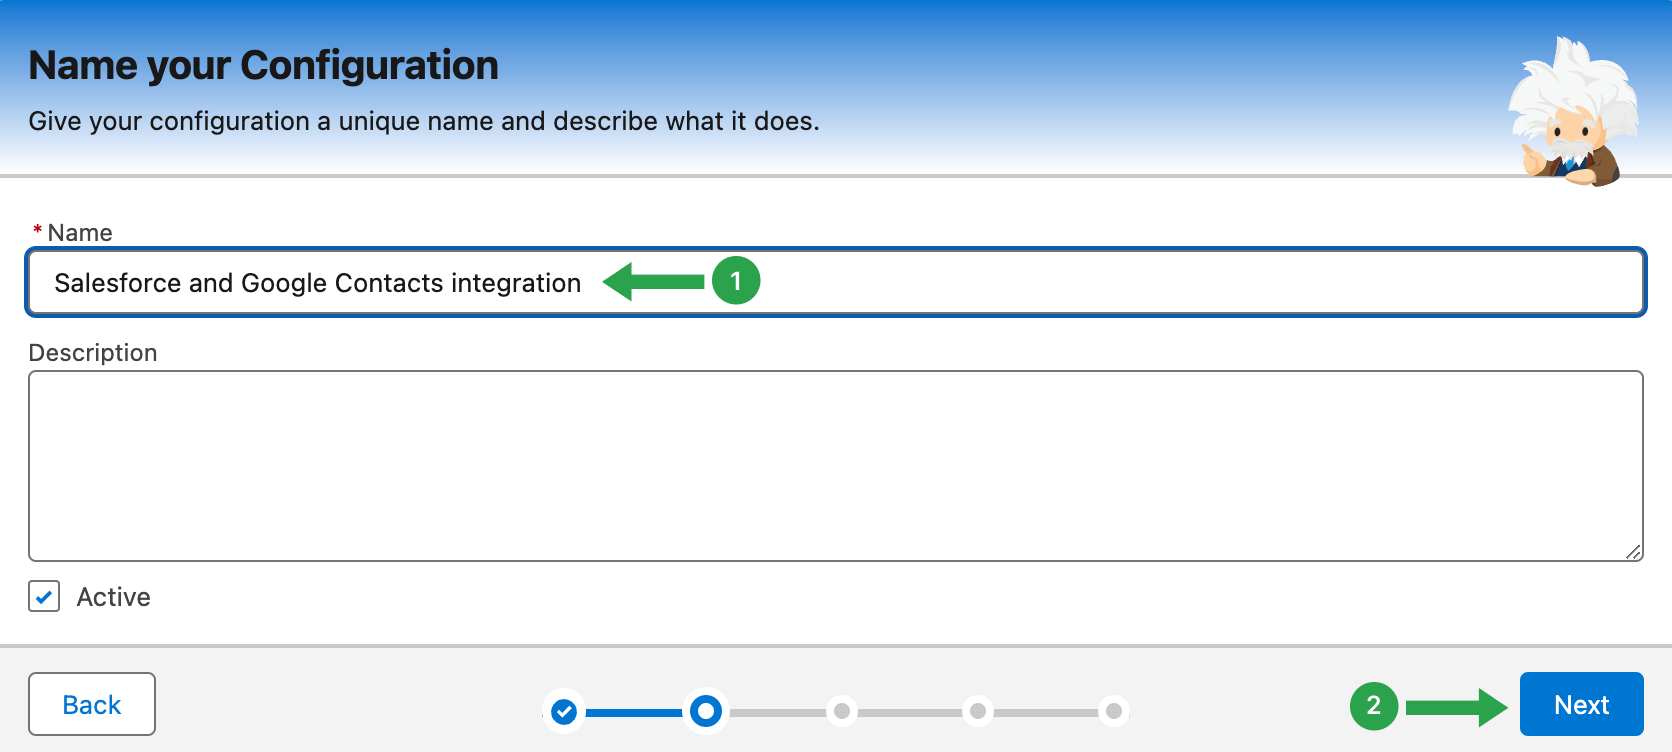
For your convenience, the system will prompt you to enter the name of the current configuration. We recommend coming up with a clear name for the configuration. Make sure the name is descriptive to avoid confusion in the future when editing existing configurations or adding new ones. Additionally, you can describe the settings in the ‘Description’ field, but this is not a requirement.
- Type in the name of your configuration
- Click Next.
3.2 Synchronization Settings
Let’s continue by setting up the desired synchronization objects between your Google account and Salesforce. You can activate synchronization for your emails, calendar events, and contacts in various directions: from Salesforce to Google, from Google to Salesforce, or both directions simultaneously.
For contacts, select Both directions (1) and press Next (2).
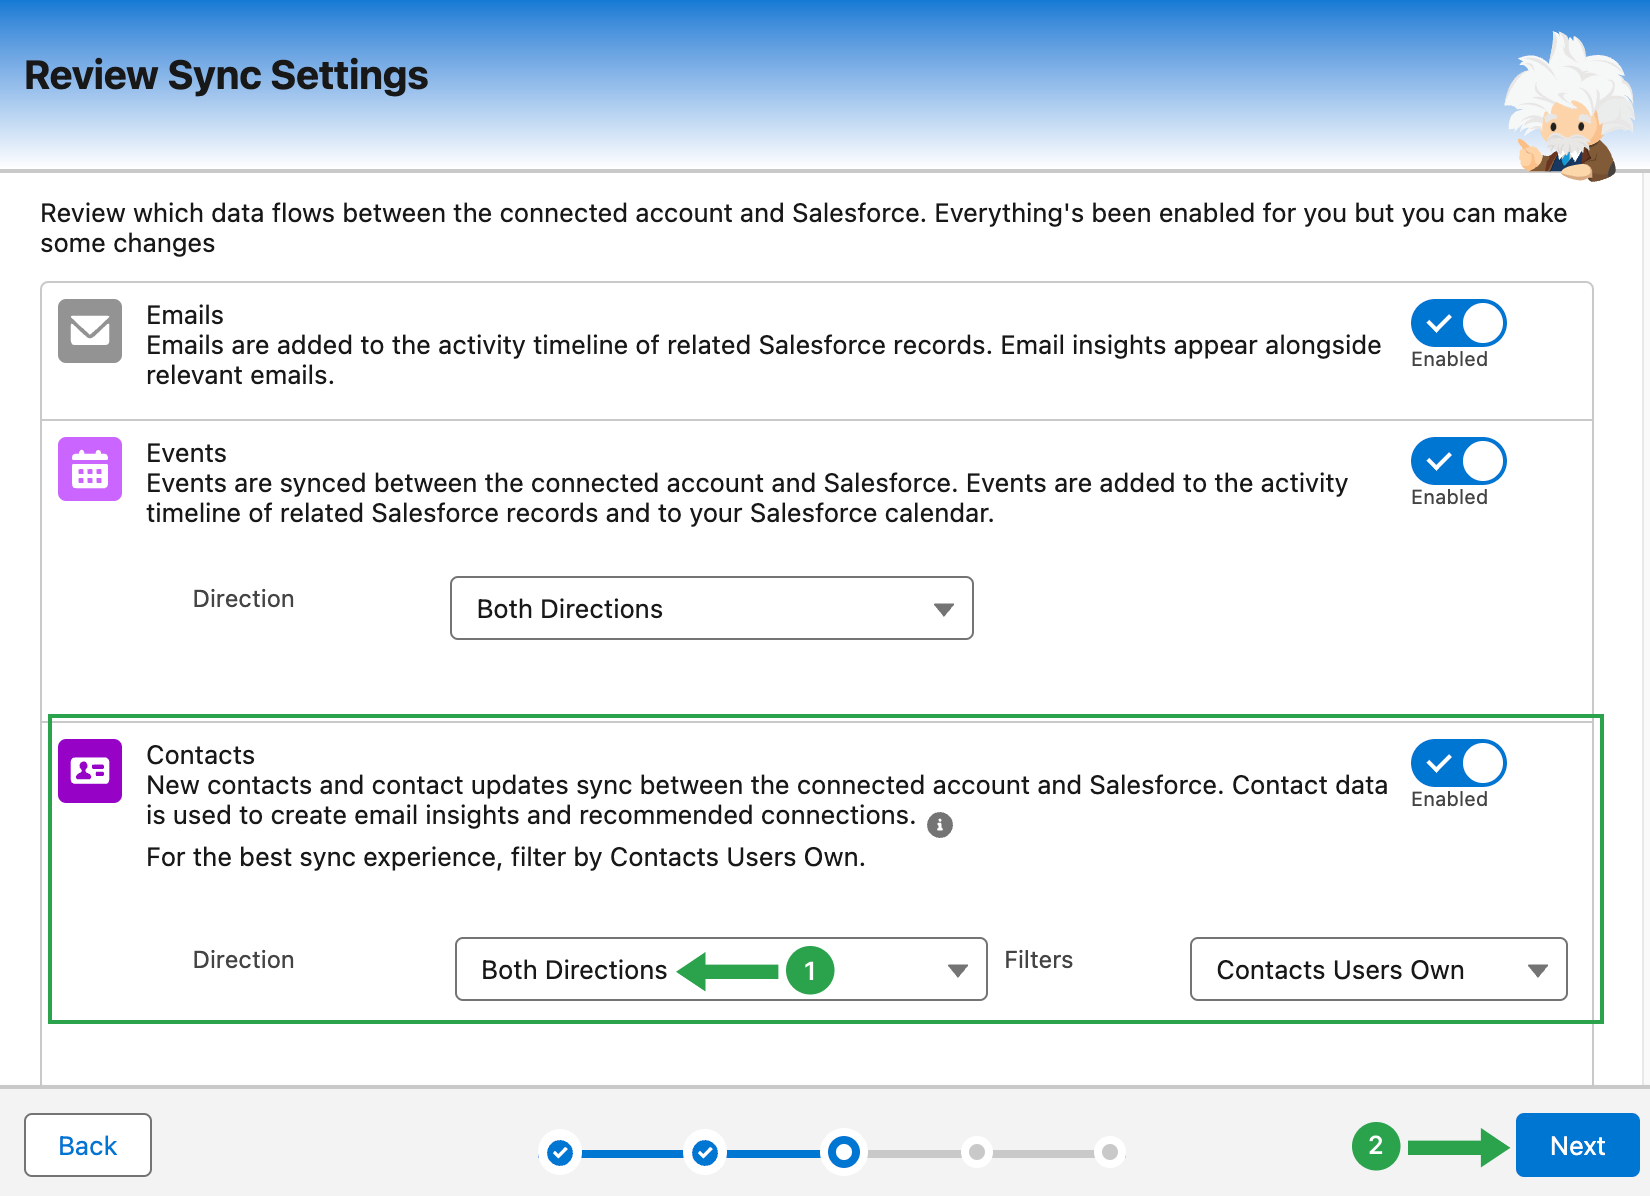
The next window, Advanced Settings, refers only to email and events synchronization. You may leave them as they are by default if you want to sync older emails or change them to ‘0’ days. In this case, only your upcoming emails will sync with Salesforce.
Click Next to proceed to the Add Users and Profiles.
3.3 Adding Users
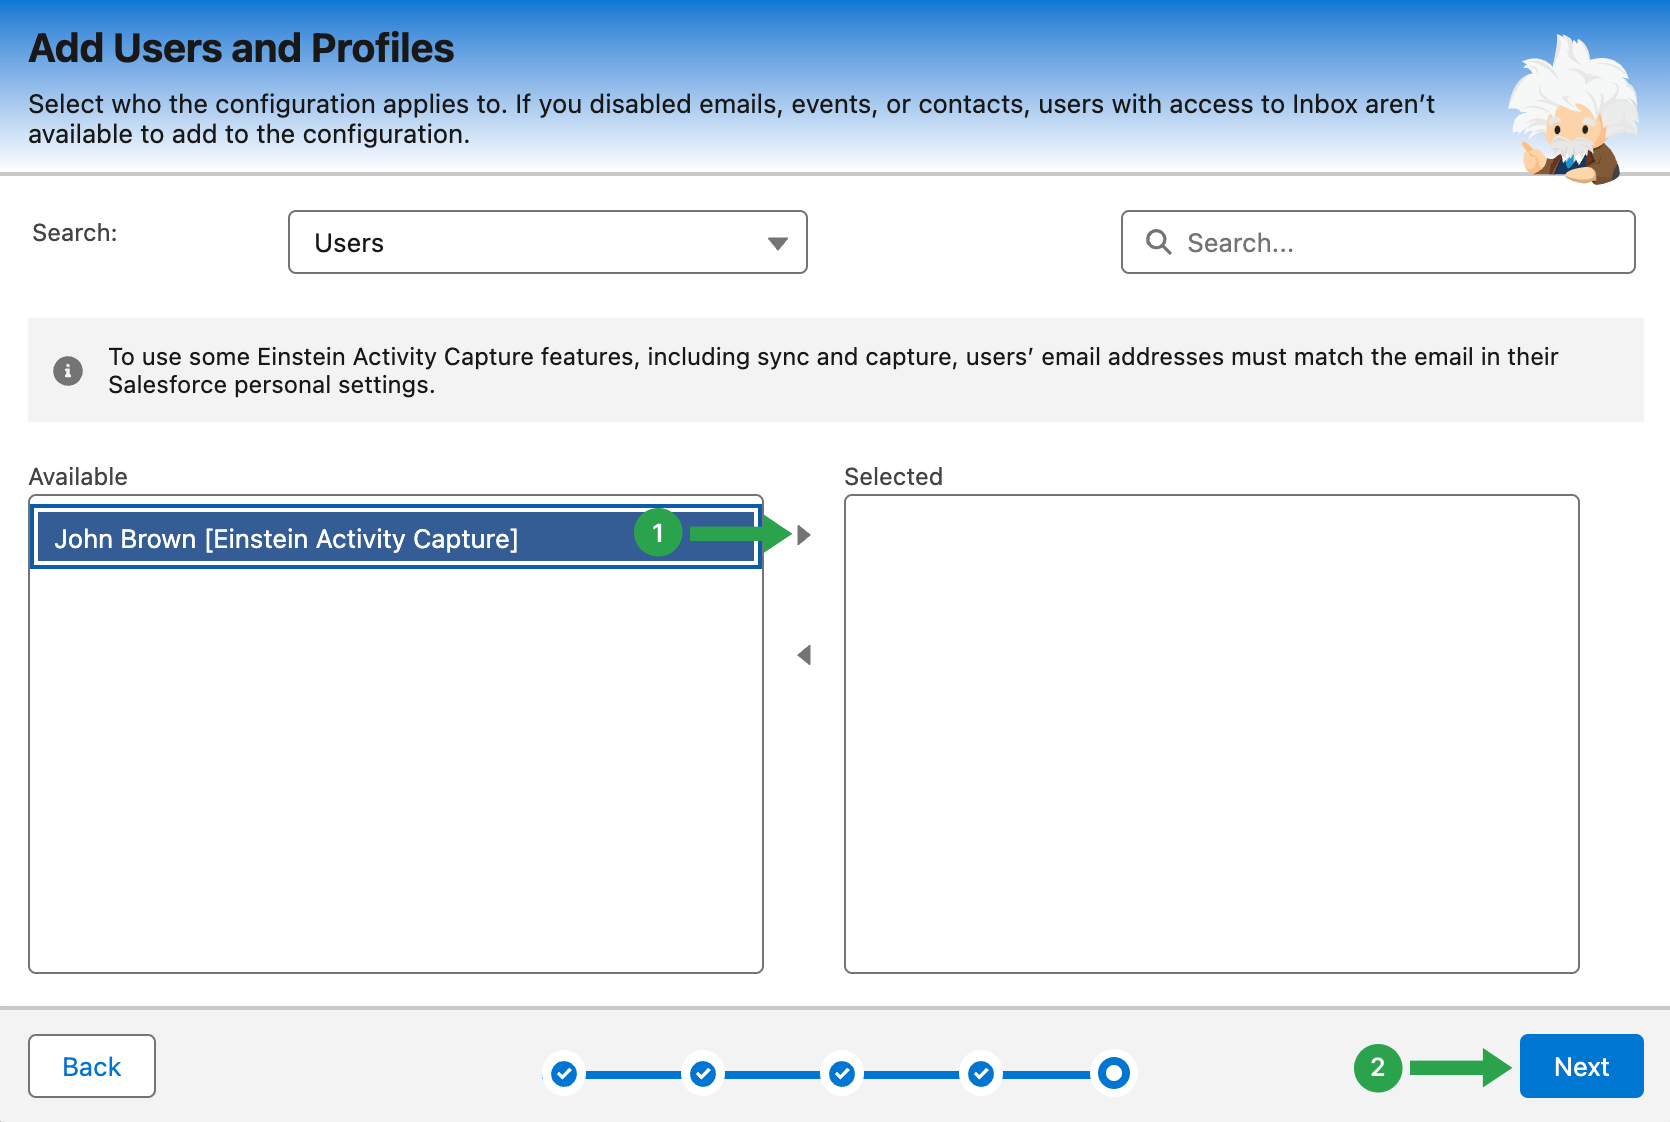
Here you need to select the individuals to whom this current configuration applies. We will apply it to the selected user who already has the license and permission sets that we provided earlier. Remember, all users who will use the tool must have the Einstein Activity Capture licenses and permission sets.
- Select the user and click on the right arrow icon to move them to the Selected field.
- Once finished, hit Next.
Einstein Activity Capture is now configured. The next step is to integrate a specific Google account into EAC and launch all these synchronization settings.
4. Connecting a Google Account
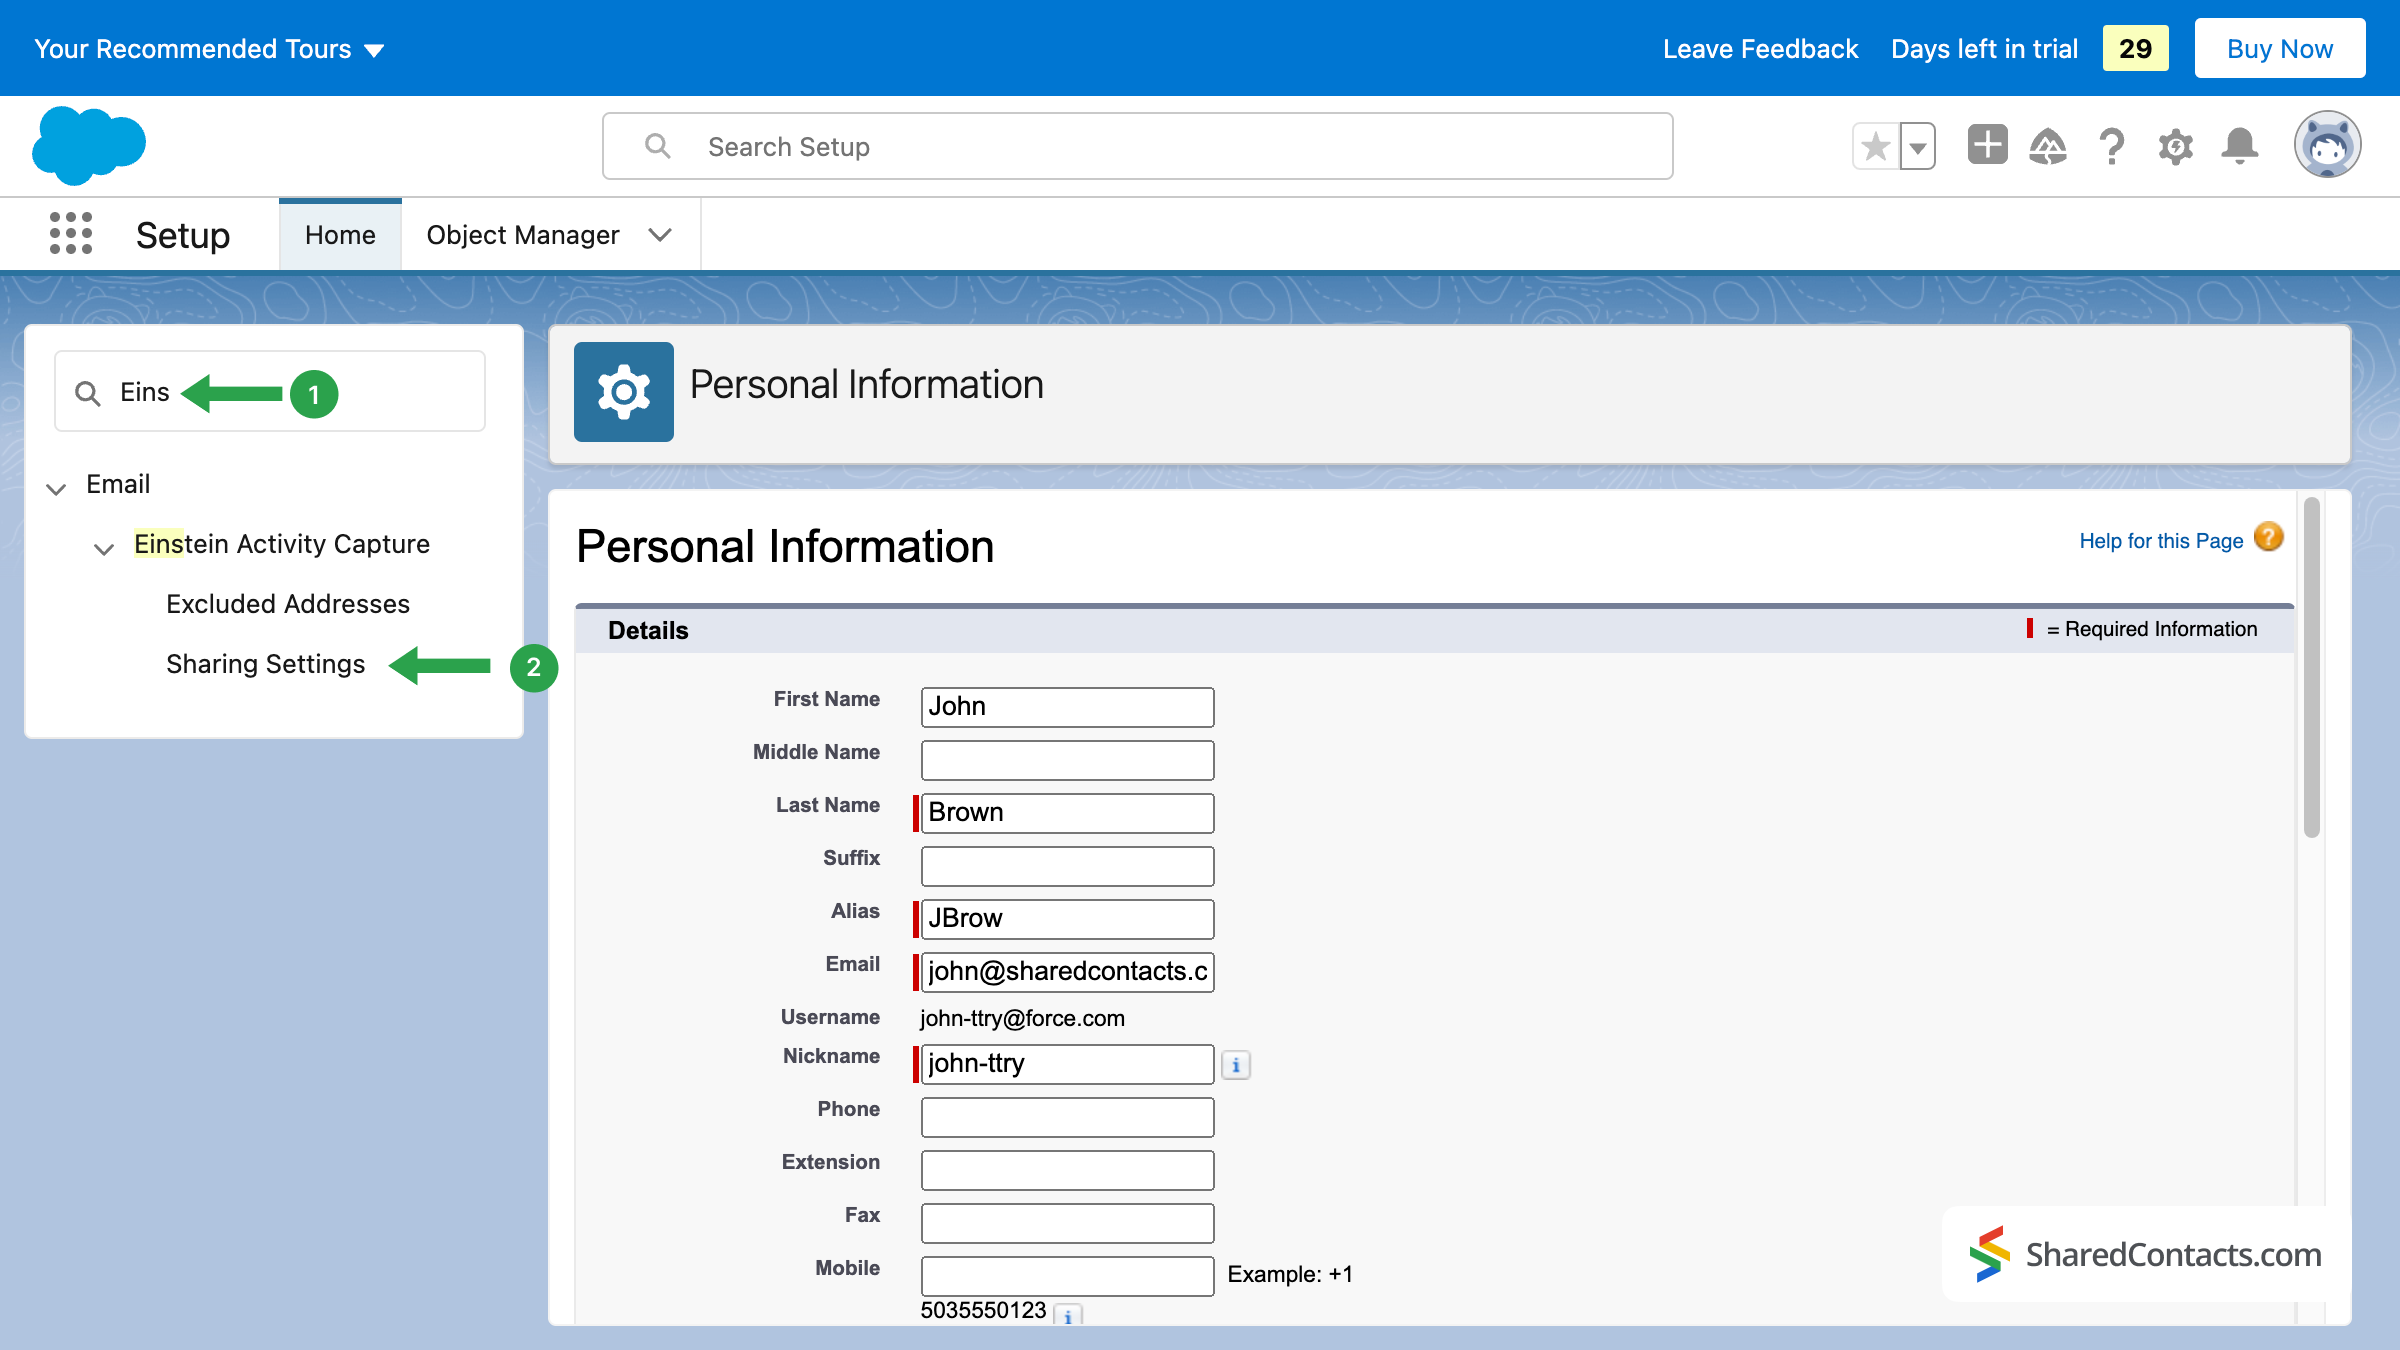
- In the upper right corner of the screen, click on the icon of your Salesforce account.
- Select Settings from the menu.
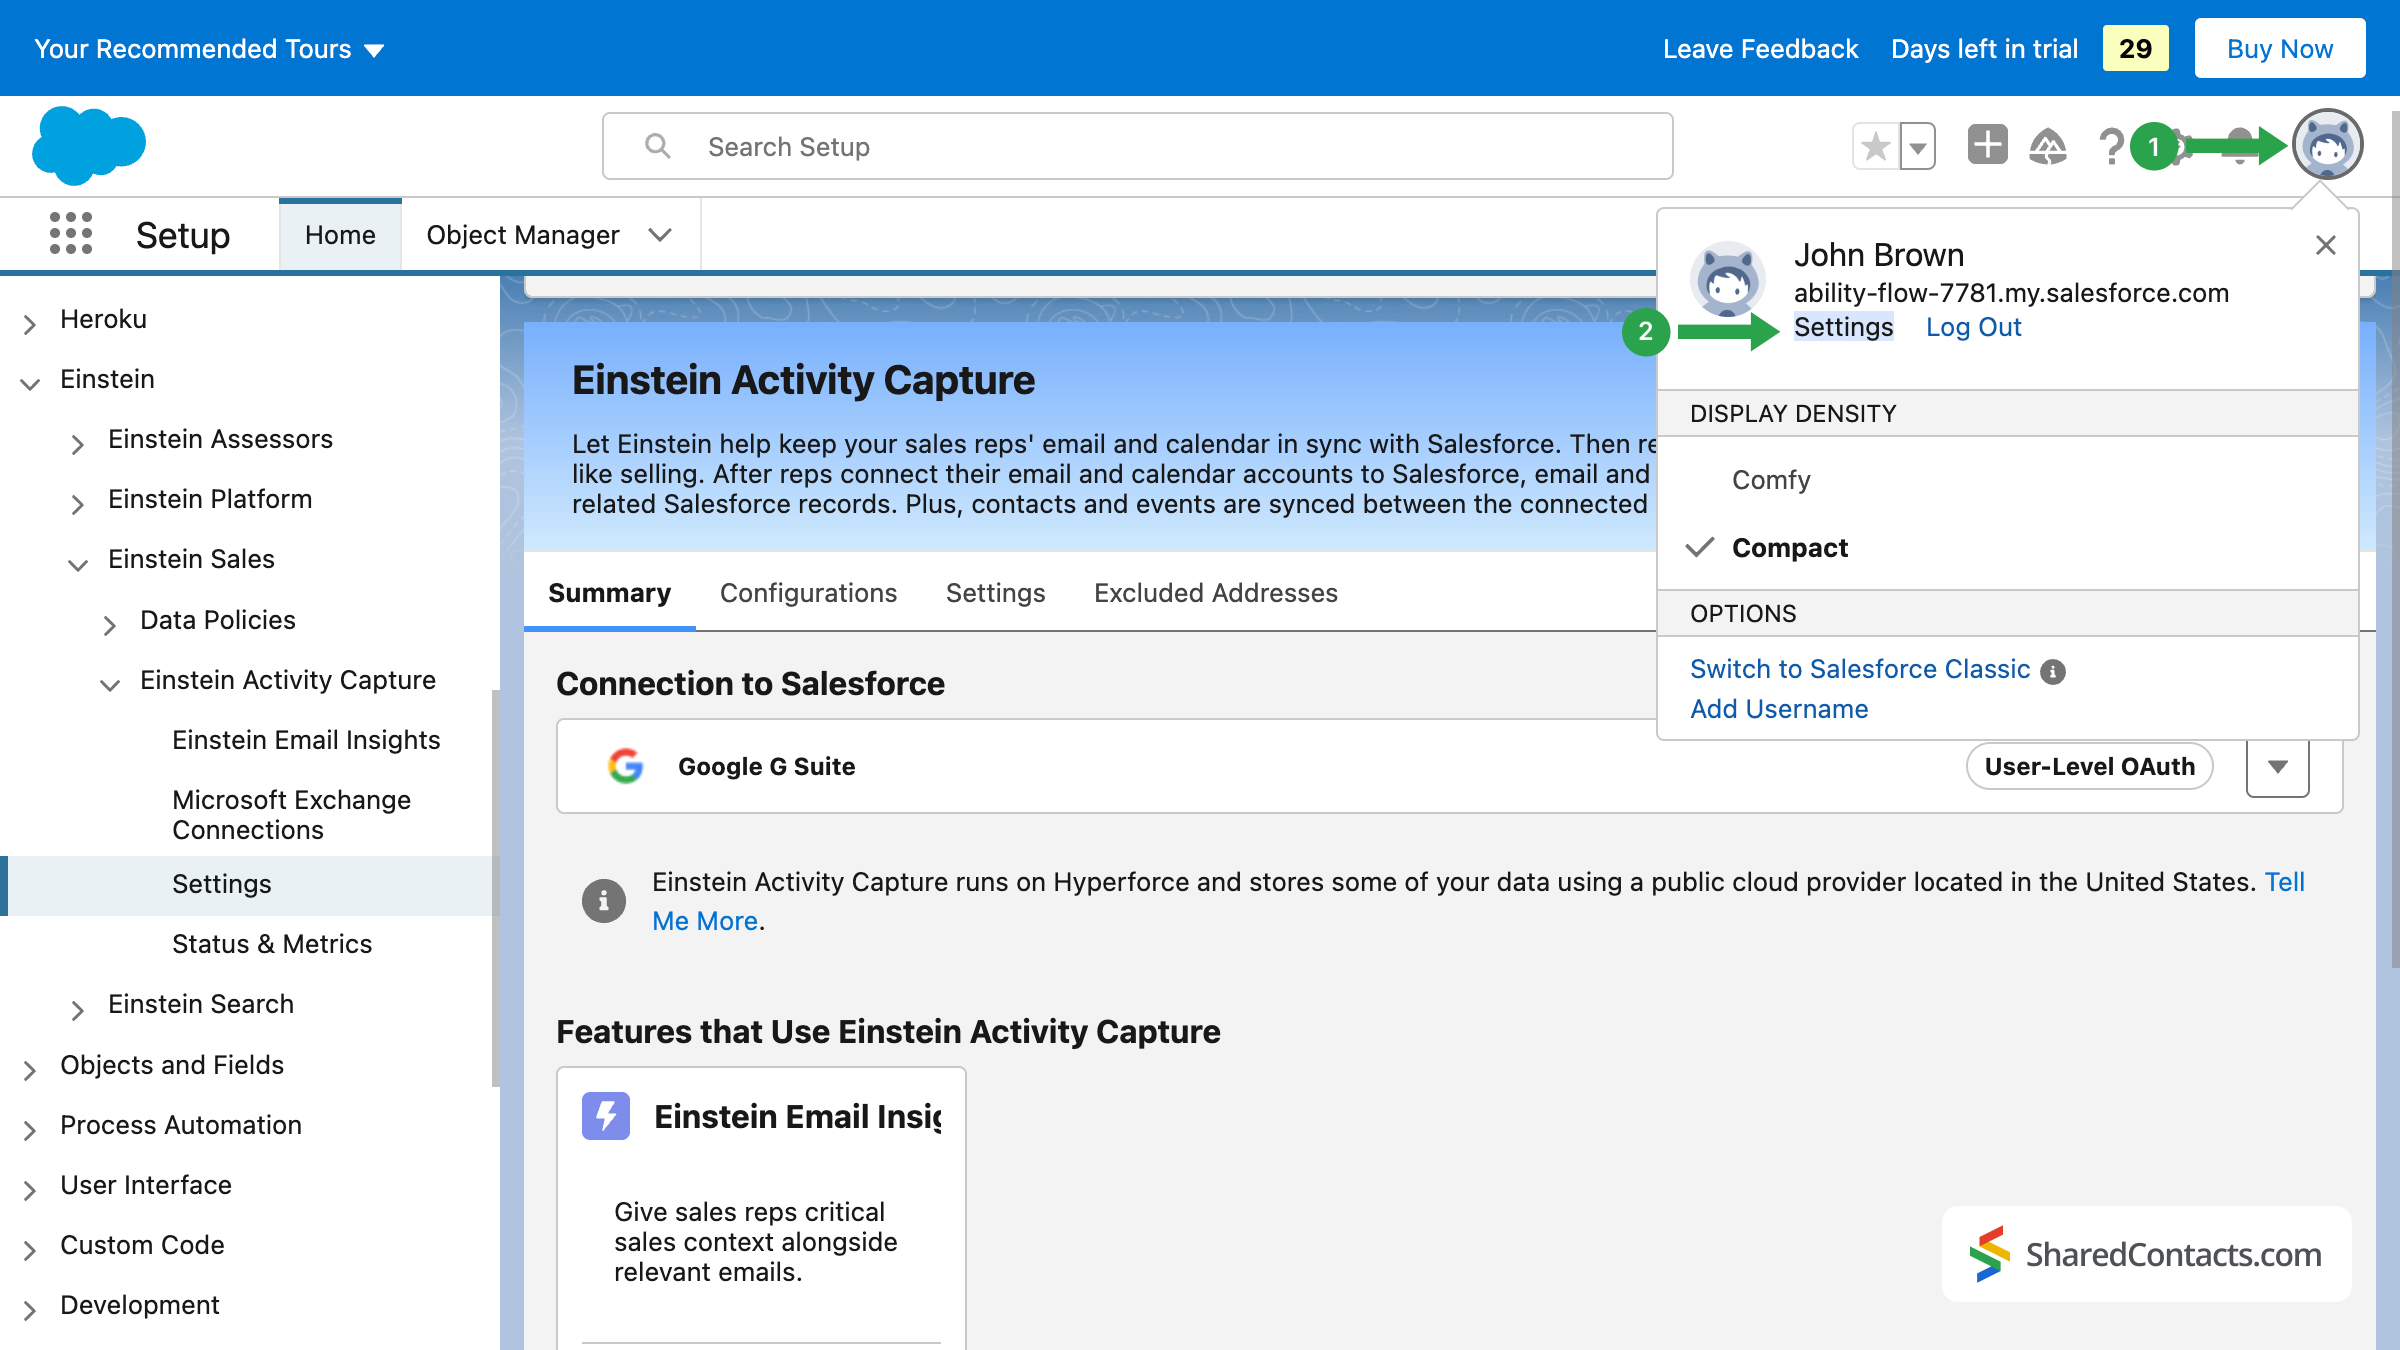
- In the search bar on the left, start typing EAC to get quick access to the menu you want.
- Click on Sharing Settings.
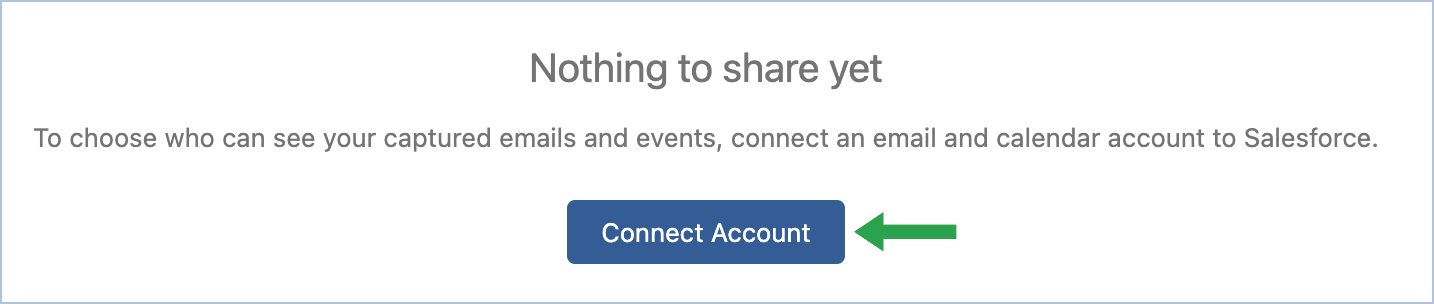
This is where you connect your account. Press the button and accept the suggested terms and conditions. Press on Connect Account.
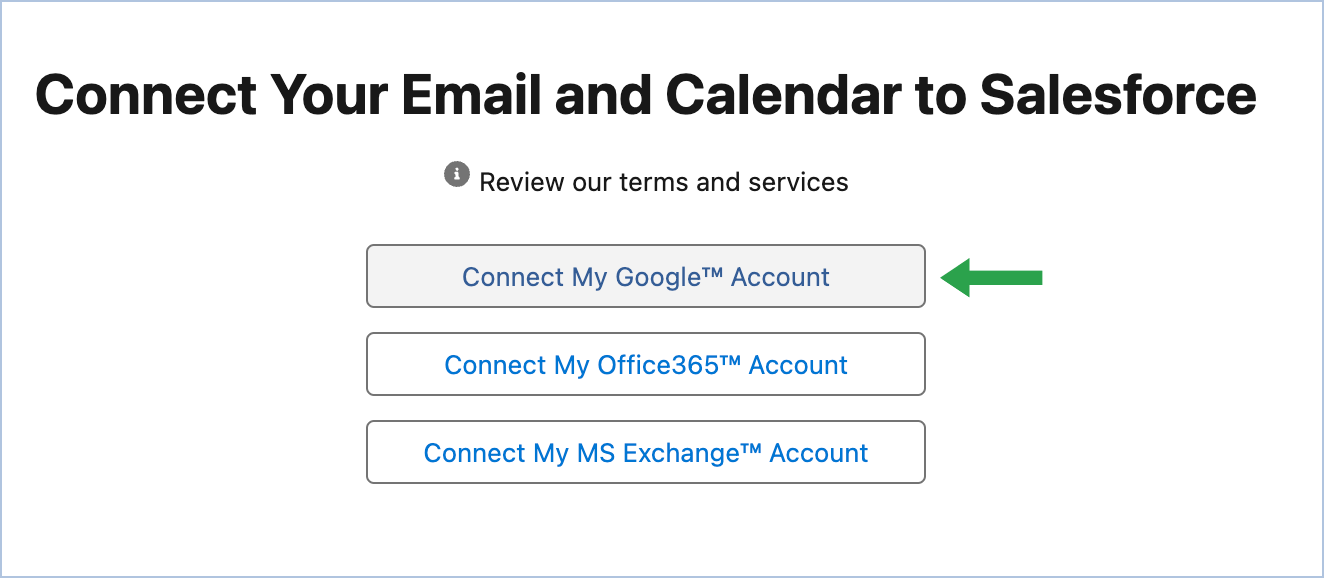
In the next window, choose your account and allow Salesforce to access it.
You have set up Einstein activity capture, configured the settings necessary for Salesforce and Google integration, and connected your Google account. Now all your contacts in Salesforce and Google are 2-way synchronized and ready to be shared with your co-workers.
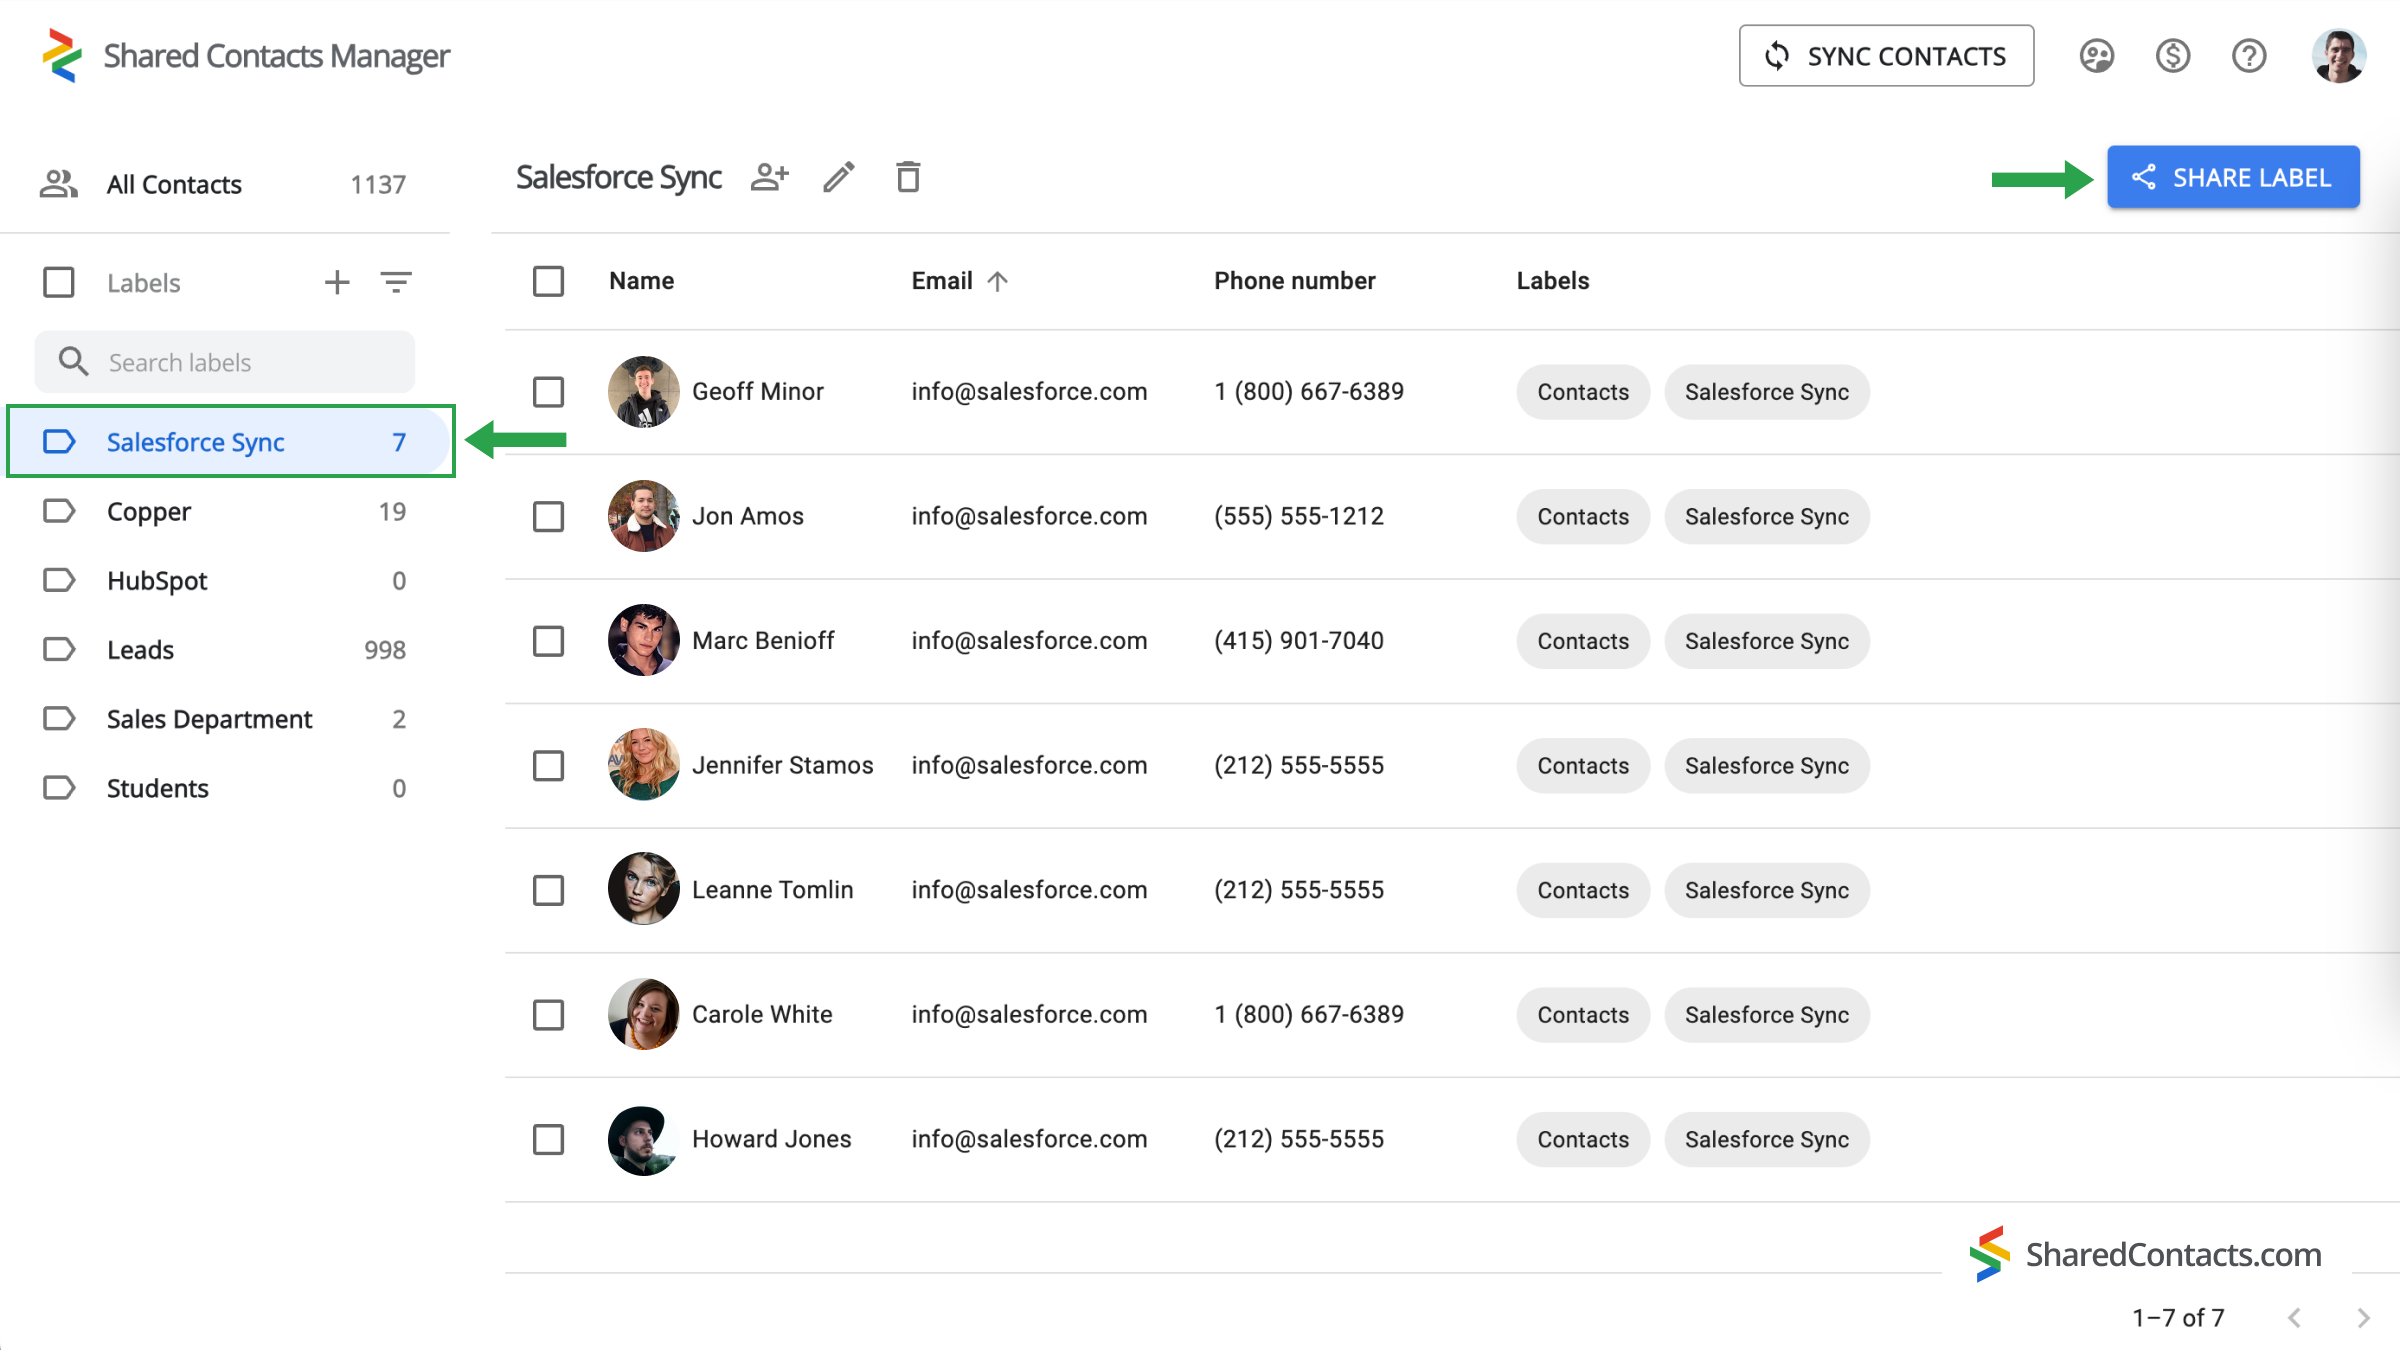
5. Share Salesforce Contacts with the Shared Contacts Manager App
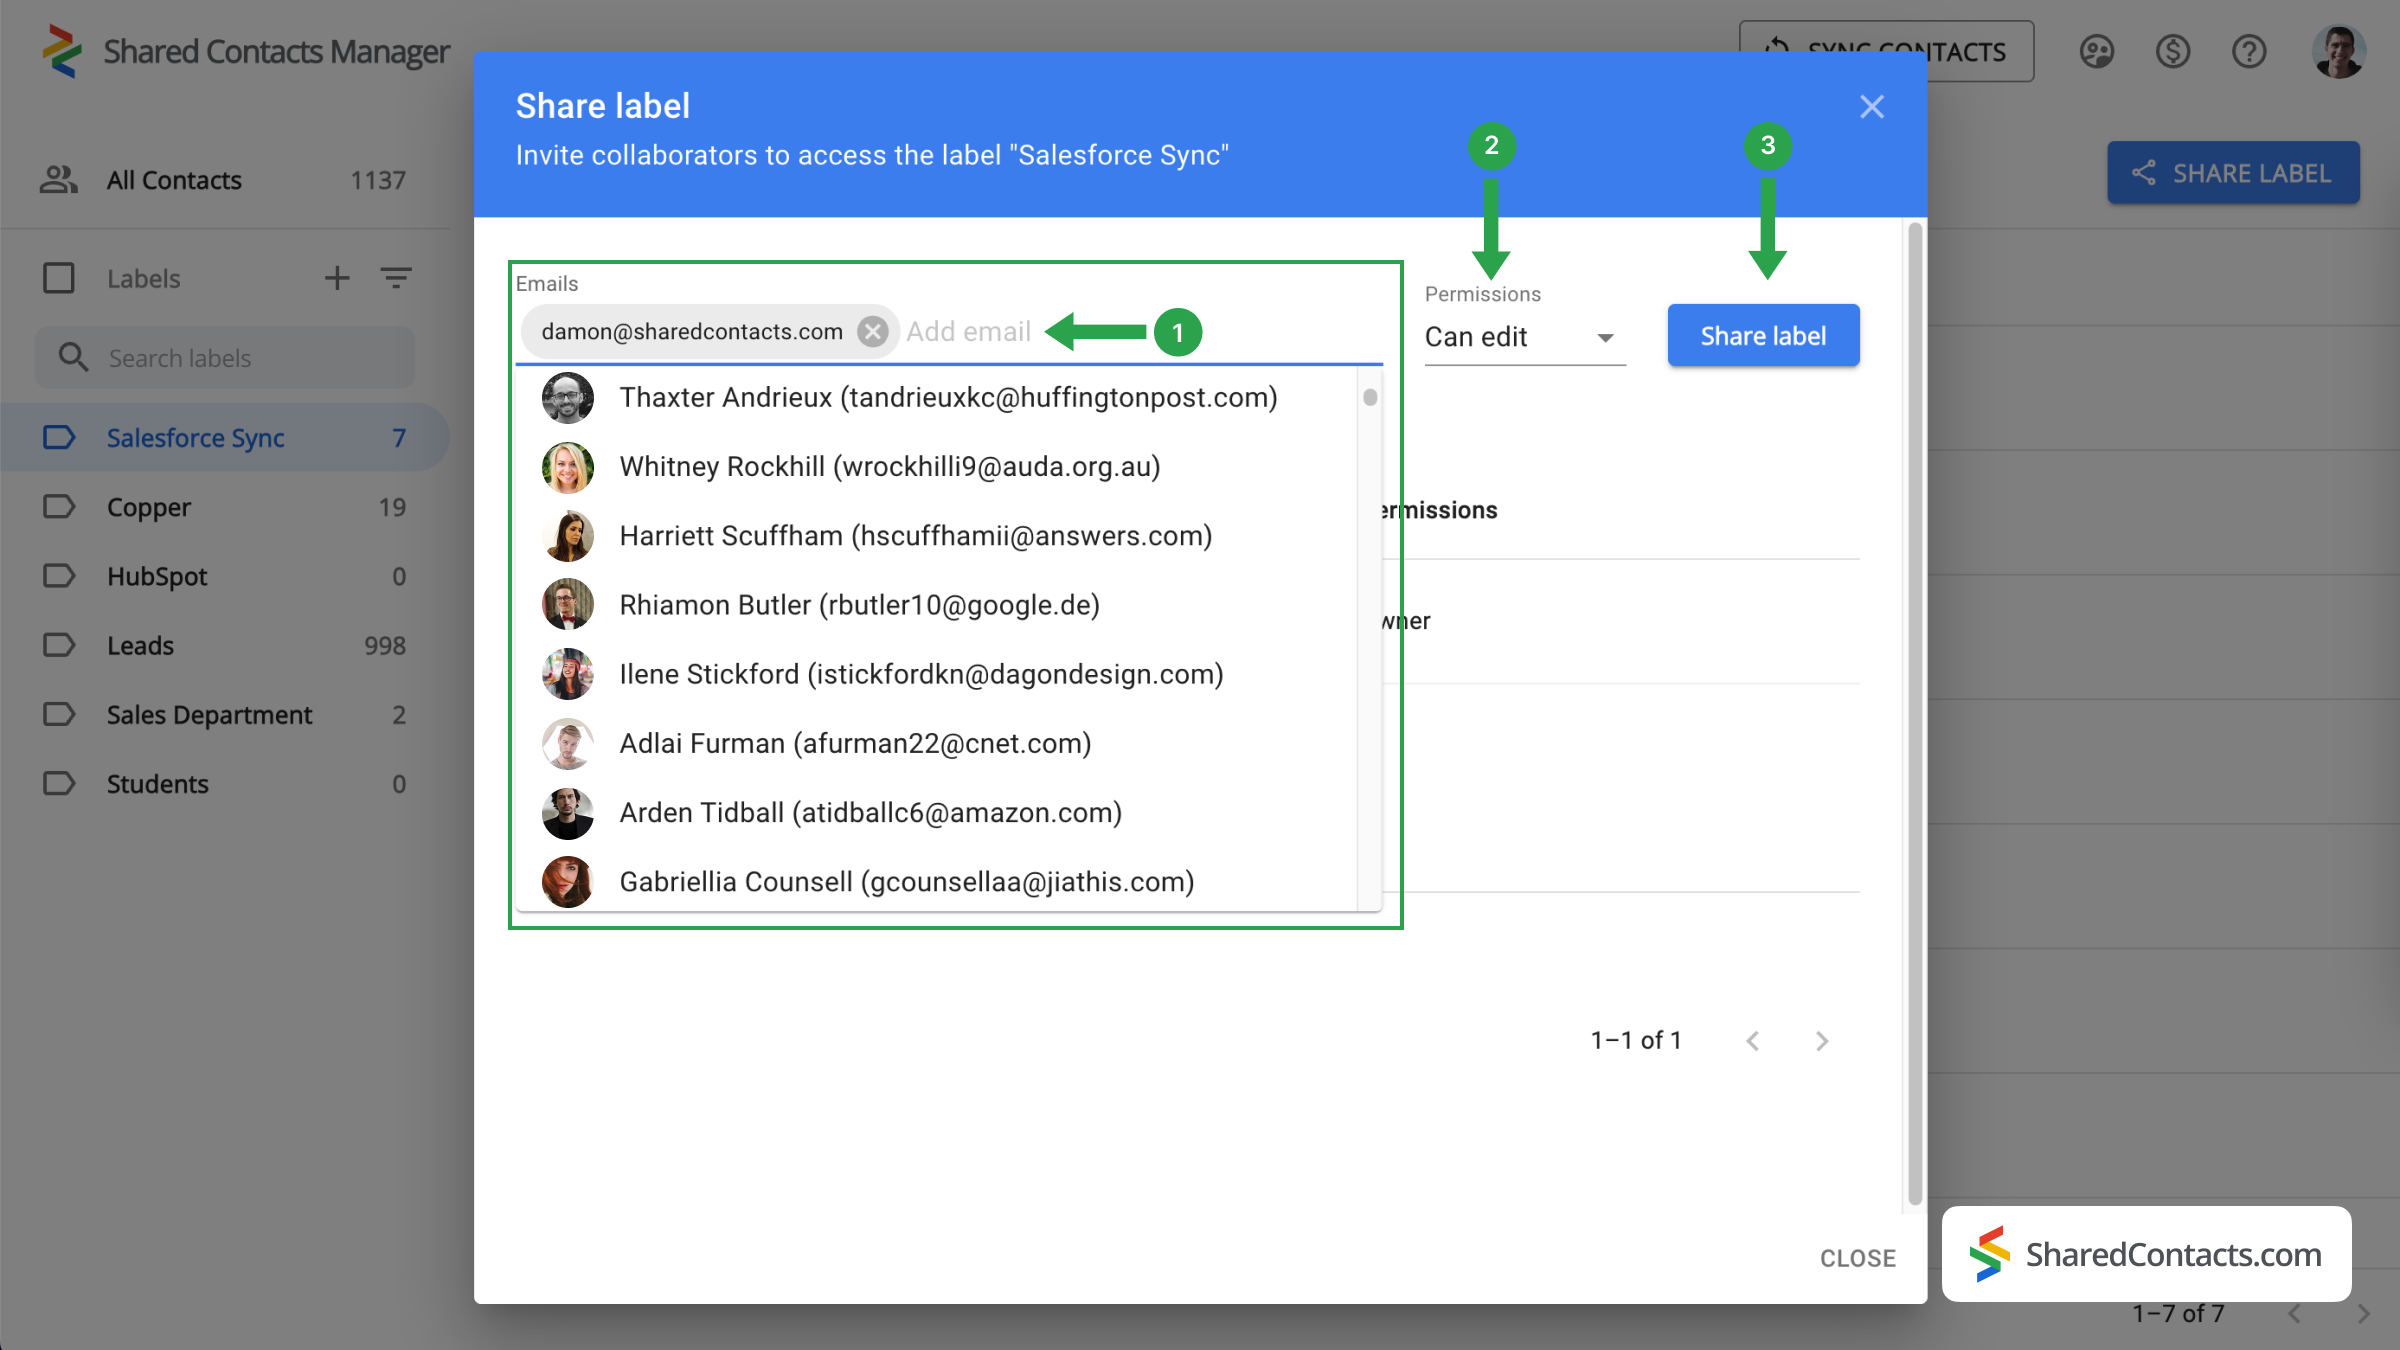
Log into your Shared Contacts Manager account. If you haven’t used the application before, click here to install it. In the left sidebar, you’ll find the Salesforce Sync label created after integrating Salesforce with Google. Select this label to view all your CRM contact data in the Shared Contacts Manager dashboard, ready to be shared with your team members, and click Share label.
In the next window, you can select who you want to give access to the contacts and set their permission levels.
- Add collaborators. There are several ways to add your team members: by typing their names, and emails, or by browsing the dropdown list. Click on the Add email field and use one of the ways to add colleagues.
- Set a Permission Level. Select one of the choices available under the Permissions menu. It’s recommended to provide your colleagues with the Edit access, allowing them more flexibility while using the contact list. Their updates will sync across all team members and display the most up-to-date information.
- Click Share label and everyone you’ve given access to this contact group will be able to interact with the contacts within the label according to your permissions.
Final Words on Salesforce and Google Contacts Integration
Google Workspace and Shared Contacts Manager provide a great solution for contact management. It’s straightforward, convenient, quick, intuitive, and highly cost-effective compared to full Salesforce licenses. Give this integration a try today and discover its numerous benefits firsthand.
Related articles

Sync Your Pipeliner CRM Contacts With Google and Benefit From Perfect Contacts Integration At Nearly No Cost
Sync and Share Zendesk Contacts Through Google Workspace, Saving on CRM Costs and Streamlining Workflow

No Comments